31.10.05

Beer for foodies?

**I'm not lost, I promise! To all my faithful readers, sorry my posts lately have been few and far between. Believe me, I've missed it and you! Sometimes being a graduate student has to come first, even though my first love is food and blogging...I've been extremely busy and taking a class in addition to all of my research, so the homework is killing me, and thus, I haven't been cooking much. I'm going to try and post on a more regular schedule and figure out some way to do my posting at home instead of at work, so hopefully things will even out a bit soon. Don't give up on me yet!**

Oh, and Happiest Halloween to you all! Stay tuned for the pumpkin pics!


In our attempt to "Conquer Eugene" (ie. take full advantage of our short time to live here by taking part in and doing everything possible that our lovely city has to offer), we recently stumbled upon a semi-new establishment - The Beer Stein. The Beer Stein has decent food (mostly soups and sandwiches) and pub-style seating (tall tables with stools and long, tall benches where you can make new friends) and an enormous collection of beer. They carry 10 seasonal beers on tap, a decent selection of wine (some local), and at the last count, 728 bottled varieties of beer from all around the world. We walked in, started looking around, and I must have tripped on Loving Boyfriend's jaw dragging along the floor about a hundred times.

The best part? You can pick up a six-pack, or case, or however many bottles you would like, and mix and match until your heart or beer belly is content. We decided we had to bring home a six pack. While we were browsing, I saw this jewel:


Traquair Jacobite Coriander-Flavored Ale

It's from Scotland. And I, of course, as you know me by now, could not resist the seductive pull of any type of beer with a food-related spin on it. Coriander flavored ale...what could that taste like? First, I had to find out exactly what coriander is...I have heard that it's the same thing as cilantro. And apparently, it is. But coriander is the seeds of the plant, while 'cilantro' is the name commonly used for the leaves, which bear no resemblance in taste to the seeds. It's a spice often used in middle eastern cuisine. Apparently, mention of coriander was found in early Sanskrit writings and the seeds were even discovered in Egyptian tombs dating back to 960 BC! I could hardly wait to get it home to try it.

And try it, I did. It's a very rich, dark beer. I don't pretend to know anything about beer, but it's yummy. When I poured it out into the glass, and brought it up to my nose, it had a spicy, earthy - even semi-floral - smell. And it goes down very smooth. The taste is sweet and herbal, and you can actually taste the coriander. I was impressed. Even cooler? It's made in an alehouse in the oldest house in Scotland! Definitely pick this one up if you like dark beer and give it a try!

26.10.05

Some girls get flowers, some foodies get pumpkins

Loving Boyfriend, and I must give him kudos for this, is not one to get flowers for me when he's pissed me off. Instead, he gives me flowers on days when I'm feeling down, when he wants to surprise me with something nice, sometimes just to celebrate how great things have been between us (I know, oh, barf), and often, for no reason at all. He picks out each bloom with care and makes his own beautiful creations to give me. I love that he does this.

However, when he does irk me in some way or another, like he did a weekend or so ago (although, I must confess that his incredibly charming smile is often enough to make me forget why I was ever upset in the first place, and lucky for him, I already can't remember why I was upset), he finds other ways to reconcile. This time, he came home with this...


The most perfectly shaped pumpkin I've ever seen. Now, this isn't exactly a pumkin that screams, "Cook with me," as it's a bit too big and I think the flavor might lack a bit, but it does scream out to me, "Carve me!" In essence...a blank slate.

This takes me back to my younger days: days when mom would take us to the grocery store to pick out our favorite pumpkin from the giant wooden bins that showed up a few weeks before Halloween. We would choose our pumpkins, take them home, and spread out tons of newspaper on the floor, drawing and designing the faces of our pumpkins to the best of our not-exactly-artistic abilities, and spend hours carving into them amidst the cautions from my mother, "Don't chop your fingers off! Be careful with that knife!" My father (my parents are divorced, and both re-married to wonderful people), I remember, also used to get very into this seasonal art (he is a very skilled artist, although he doesn't get to use his talents very often these days), and even purchased a set of small pumpkin carving knives that we would often use to carve out elaborate designs on our pumpkins at his house. After the grueling work was finished, we would light up a candle, place it inside our creations, and put the pumpkin artwork on display on the front porch, where it usually remained until nature got ahold of it and the faces started to change with the folds and creases of decay. The best part of carving pumpkins, of course, is sticking your hands into the ooey-gooey orange mess of seeds and strings inside the pumpkin and pulling out the seeds to roast and toast in the oven.

All of this got me thinking. Since I wanted to name the title of this post what I did (well, I think it's cute anyway!), and since I had promised I would mention that he'd gotten me a pumpkin instead of flowers - I was thinking how I could incorporate a Jack-o-lantern pumpkin, more suited to carving than to cooking, into my foodie blogging world. I thought, well, I could carve something foodie-oriented in it...thinking perhaps apple trees, foodie gadgets, etc. Anyone have any creative ideas? Anyone as dorky as me and actually done this? I haven't gotten to it quite yet, but as soon as it's carved, I'll post a picture and we can all have a good laugh about how my father's artistic ability didn't get passed down!

25.10.05

Pumpkin-spice pancakes with sage sausage


This is one of my favorite breakfast recipes! We are lucky enough to take part in a CSA (Community Supported Agriculture) from a local farmer that provides hormone- and antibiotic-free, grass-fed free-range beef, pork and eggs.
This is separate from our vegetable CSA that we had, as we haven't started back up with one of those yet, and it functions a little differently than a normal CSA would.


The eggs are delivered to our doorstep every Wednesday (we feel so lucky!) and Paul, from Laughing Stock Farm, calls us whenever he's going to have a share of the meat. The beef and pork is incredibly lean, which is sometimes a downfall with the beef (a well-marbled beef cut makes for such tender, flavorful, yummy deliciousness...), but the pork is absolutely amazing. My favorite part? We get homemade ground pork sausage...sans
the seasoning.

When I first realized it wasn't seasoned, I wasn't sure what to do...but then Emeril came to my rescue! This is a modified version of his chicken-apple-fennel breakfast sausage, which I'm sure is wonderful, but I never seem to have apples or chicken around when I want to make it, so I've adapted it to what I do usually have on hand.


Sage Breakfast Sausage
, modified from Emeril

4 tbsp. olive oil
1 1/2 tsp. fennel seeds

1/2 cup chopped onion
1 tsp minced garlic
1 1/2 lbs. ground pork (ours is sausage, so it already has fat in it - this would be healthier!)
1 tbsp chopped fresh sage leaves (don't use ground sage - this is the best part!)
1 3/4 tsp. salt
1/2 tsp. pepper (white pepper if you have it)
2 tsp. paprika

1/4 tsp. cayenne pepper
1/4 tsp. ground nutmeg

Heat 2 tbsp. oil over medium heat and saute the fennel seeds until they turn a golden color, about 1 minute. Add the onions and cook until tender and translucent. Add the garlic and cook for 30 seconds, then remove from heat and allow to cool for a few minutes.

While the onion cools, combine the pork and seasonings together in a small
bowl...gently...don't overmix. Then, add the onion mixture when it has cooled, and mix the entire thing together. Form patties (makes 8-12), then if you're using just ground pork, add a tbsp. of olive oil to the pan and cook in two batches until cooked through with no pink in the middle...you won't need more oil if you're using pork sausage.

We served these with pumpkin spice pancakes - adding 1 tsp. of pumpkin spice (try this mixture from Nic at bakingsheet, who also has a great cinnamon pancake recipe) to your favorite pancake batter. I actually forgot to bring the pancake recipe with me today, but ours is from the Joy of Cooking, our stand-by...but you could use any pancake recipe. If anyone wants it, let me know and I'll add it here. I'd like to make pancakes with real pumpkin, but I haven't tried it yet since I'm not sure about the amount to use, so anyone that has a good one - I'd love to hear it! Enjoy!

22.10.05

Sometimes it's hard to make friends...and sometimes you find friends in places you would never have imagined...


Sitting at work on a Saturday can be a huge drag. But since I started blogging, I actually look forward to coming into work, even on the weekends, just so that I can use a computer to check up on my friends. Friends. Yes, I've come to think of many of the people whose blogs I read daily, both near and far, as friends.
Every day as I read through their blogs, I am learning who they are and some of the intricacies of their daily thoughts, what their surroundings look like through their gorgeous pictures, and laughing out loud with them - those deep belly laughs, the kind that rolls up from your belly through your chest and out your mouth in loud gusts until you don't think you'll be able to stop, and your cheeks hurt in the best way possible from smiling so much. They take me on road trips with them (sometimes even to my home state!), or to places I've never been, and I live vicariously through their descriptions and photographs...and sometimes just drool over their culinary creations. I feel like I've been standing around with them during the warm and comforting events with their family, met their adoreable pets, and seen them making new friends when they get to meet other bloggers, and sometimes, even sharing a sad moment with them. They not only inspire me, but encourage me, and offer their thoughts. I feel like I know them. You. It's amazing to me to think about bloggers who have been at it for months or years...I've only been doing this a few short months, but already I tell their stories to Loving Boyfriend as if I've known them for years..."...My friend, Ilva, in Tuscany, she posted the most beautiful picture she posted of this villa today - we have to go there someday!" or ..."Vickie, my friend in Vermont, knows how to make little dumplings!," or ..."My friend Shauna in Seattle is the aunt I want to be when my nieces get older!" ...and there are so many more (I wish I could link to everyone!).


It's hard to move to a new place, and I've done a lot of moving in the last several years (13 times in one of those years!), which meant that it was difficult to make close friends. The kind of friends you want to sit with in your kitchen , pour a cup of tea, and talk for hours. When I started graduate school, and met my dear Loving Boyfriend, he had been here in Eugene for over a year...and already had a good friend base. Those people slowly became my friends as well, and I love them dearly, but I've always struggled to find them on my own. As I get older, I've found it more and more difficult to meet people that are like me, want or are interested in similar things, or that I even feel like I could talk for hours with.

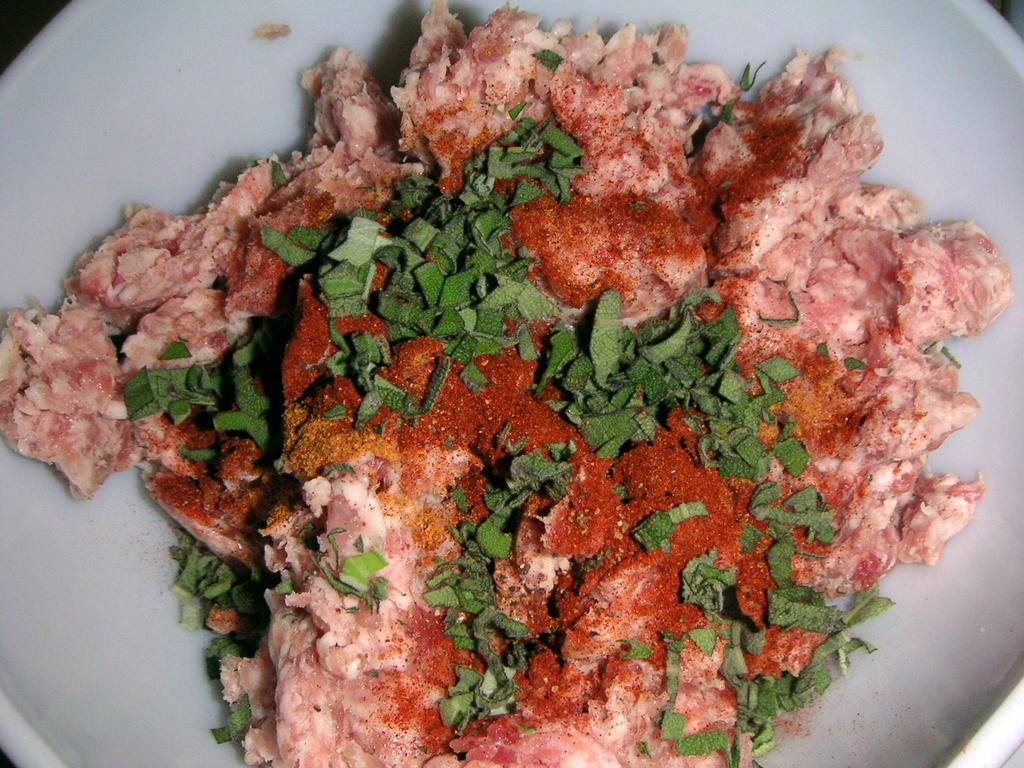
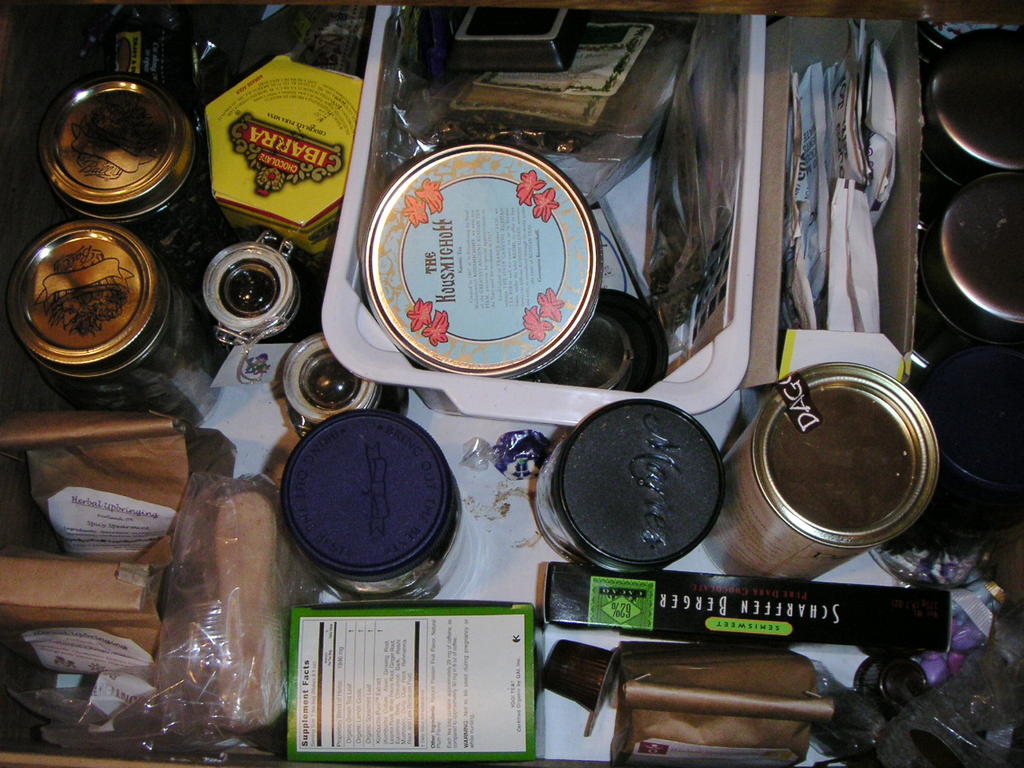
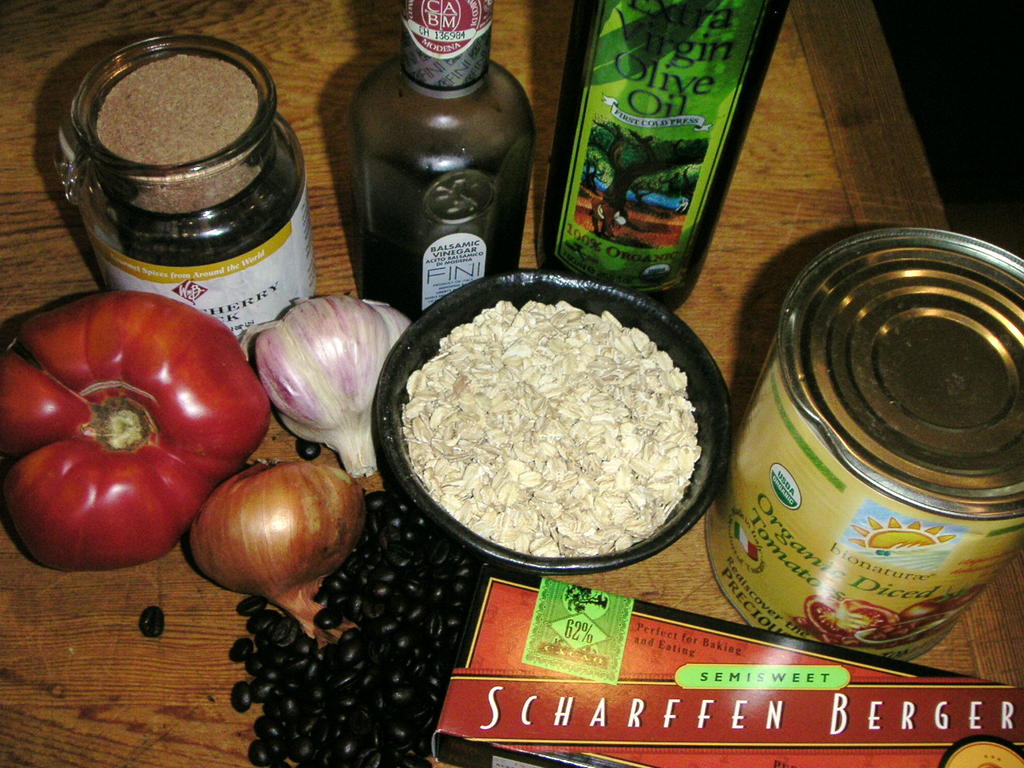
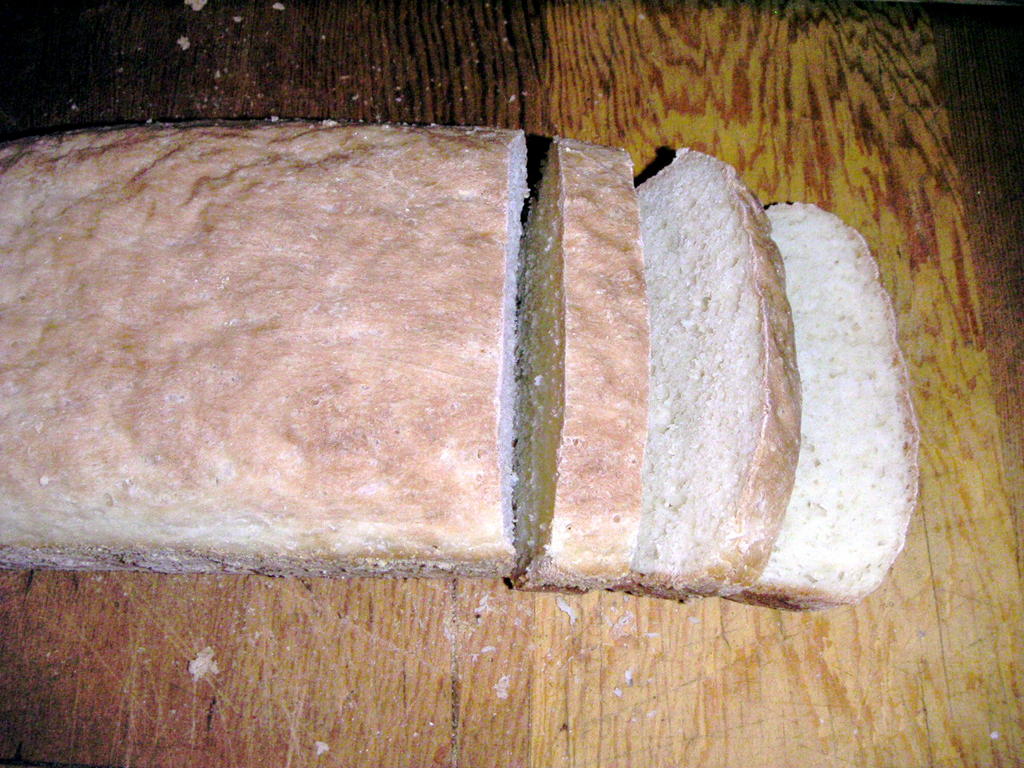
Through blogging, food has brought us all together...our love for it, for making it for friends and loved ones (or even ourselves!), sharing how it makes us feel or how it brings us close to those we care about. Even sharing our excitement about finding a new Farmer's market, or a beautiful ingredient in the grocery store, or a cooking disaster we would never want anyone to actually eat...just to share a few laughs. And it's become a forum...for asking for help on how to store something, what to do with that new ingredient, or getting our hands on something we can't get where we live, and even for finding a shoulder to lean on.

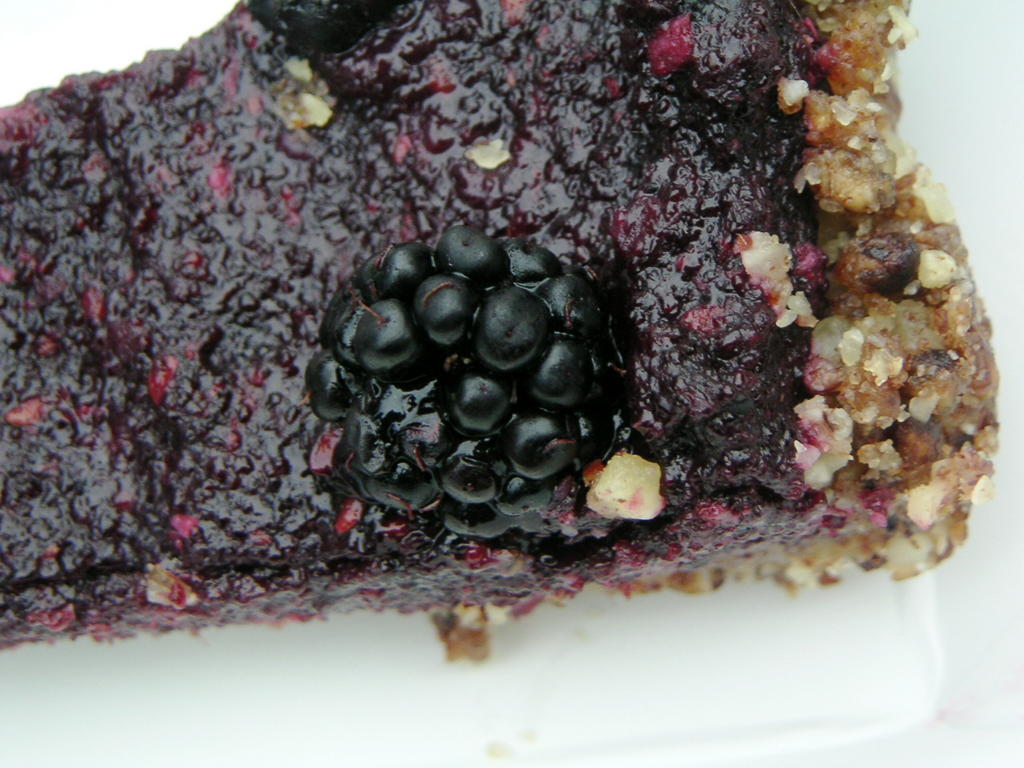
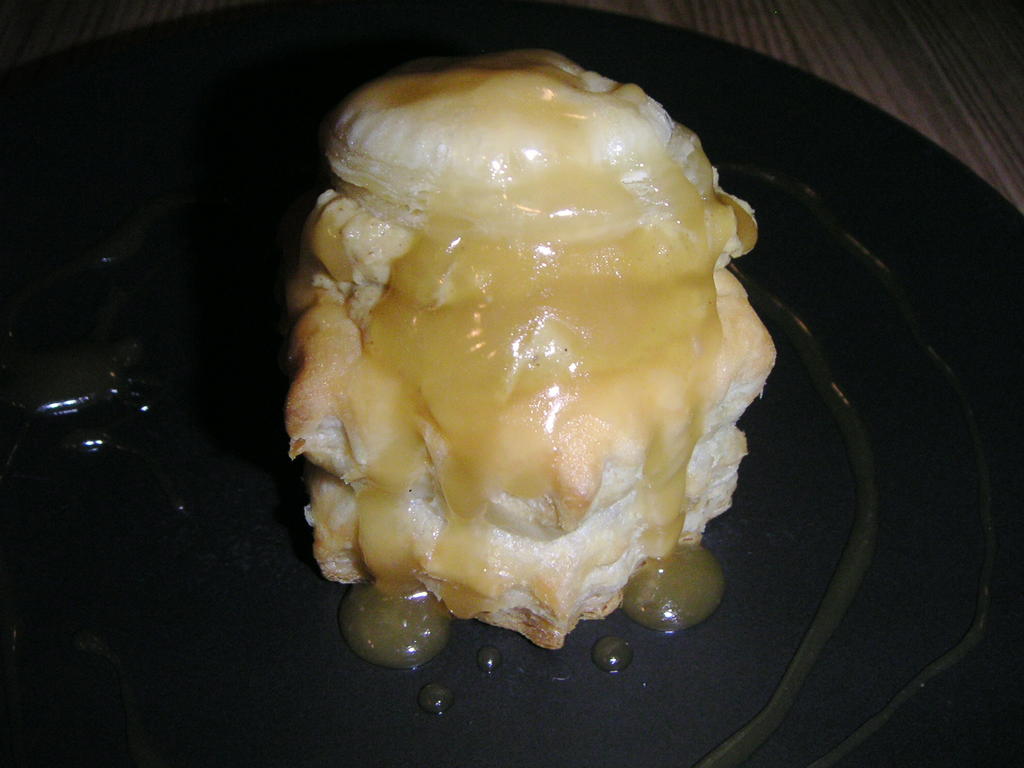
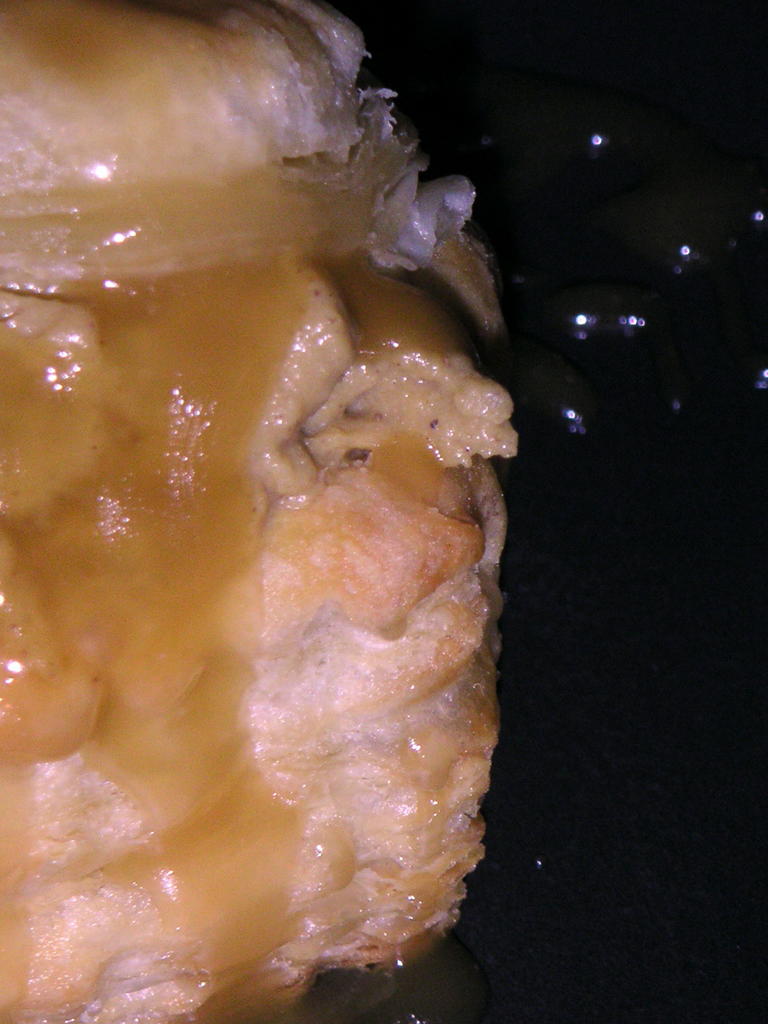
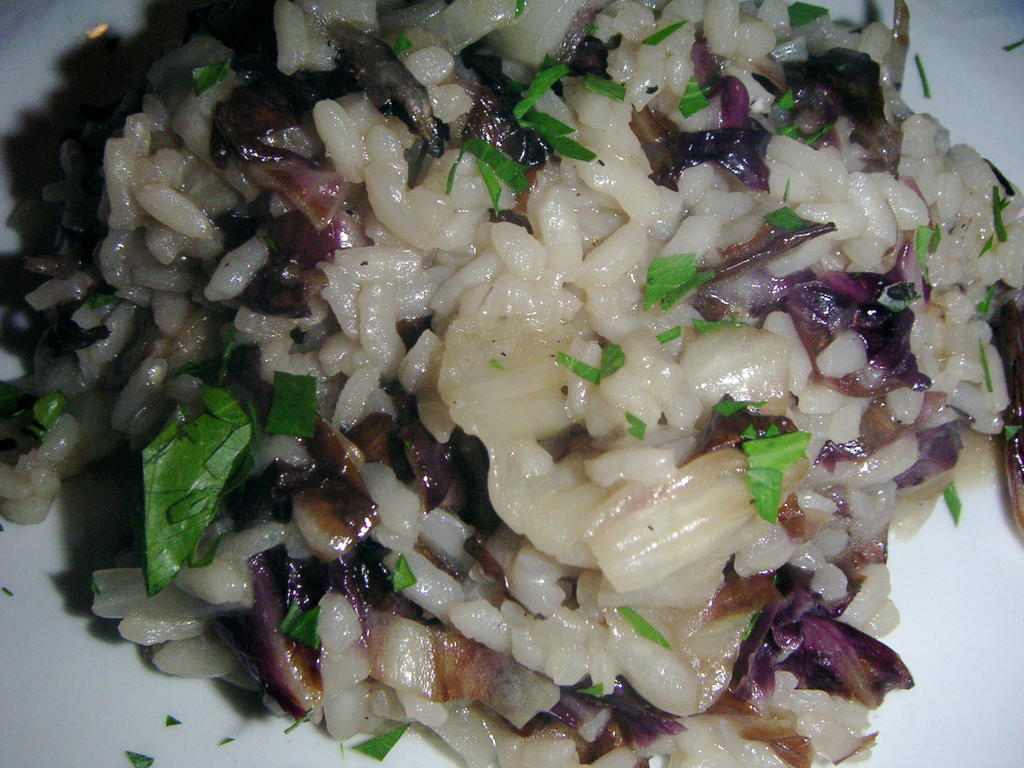
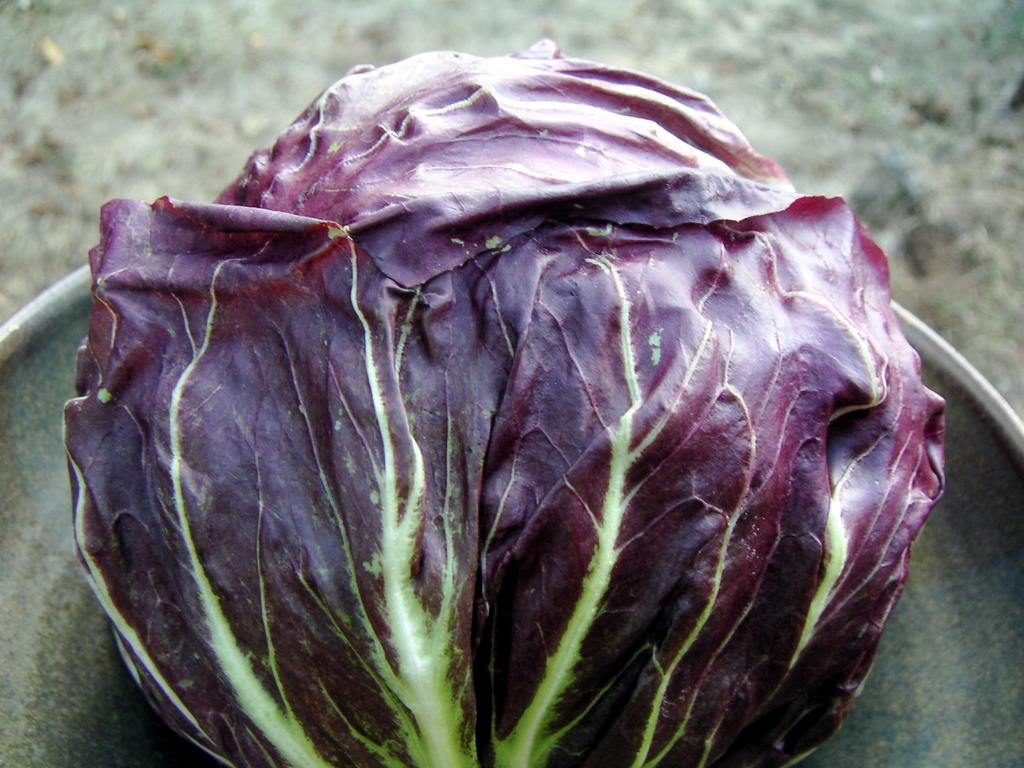
On Tuesday, I was lucky enough to meet McAuliflower, the creativity behind Brownie Points (if you haven't checked her site out yet, you should!). I couldn't believe when she commented on my site that there was another food blogger in Eugene...and just a short jaunt down the hallway in the same building I was in. When she suggested we go to Marche Cafe here, I already knew I liked her - it's my favorite place to eat here on campus. But she was so easy to talk to - we talked non-stop for an hour and a half, and not only about food (though, of course, that subject came up)...and to hear excitement in someone else's voice when they talked about how beautiful their salad looked, - and it was! - it was like coming home. Like being back in the days I used to sit around with my favorite girlfriends in high school and college and excitedly chatter about boys we all knew, or things that had happened in our past - girls who knew my history, my parents, my friends (Katie, that's you!)...something I truly miss after all that moving, when there just isn't enough time to learn all the nuances of someone you meet until long after you've moved away. And these days, with all of life's obligations, it seems like too much time goes by without feeling that closeness, talking to a close friend who truly shares in your excitement about something, who realizes how much you truly love something and who knows you inside and out. And I am now realizing just how much I miss that...but I left my lunch with McAuliflower feeling satiated, excited, and yearning to know her more...and I hope I will.


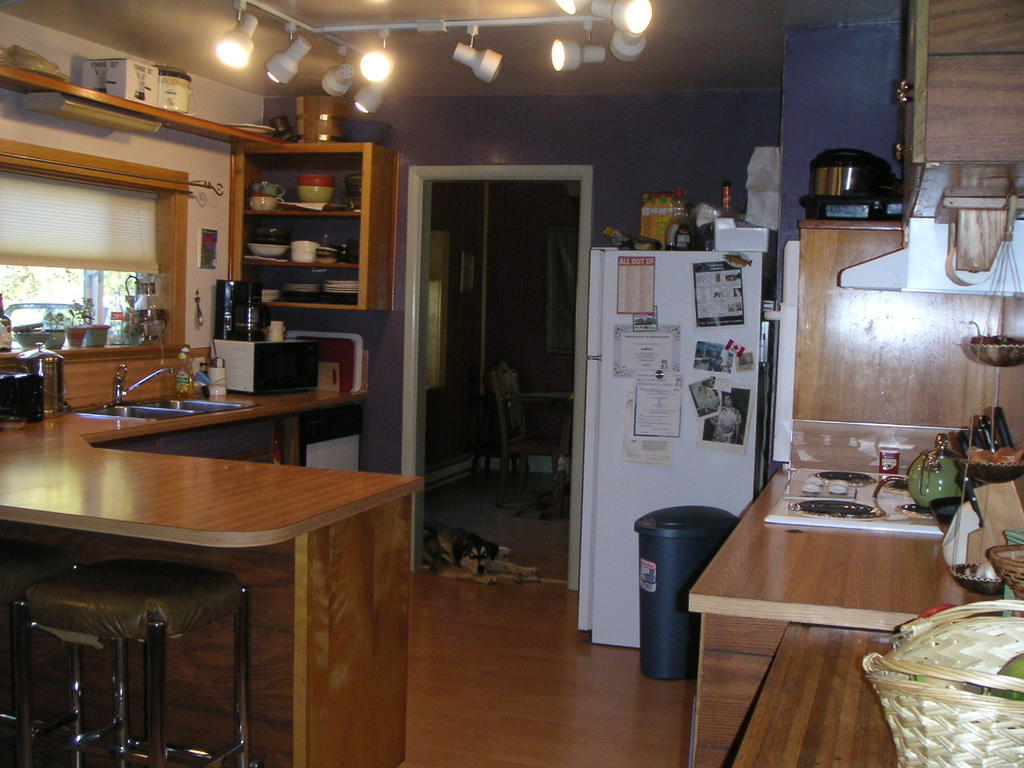
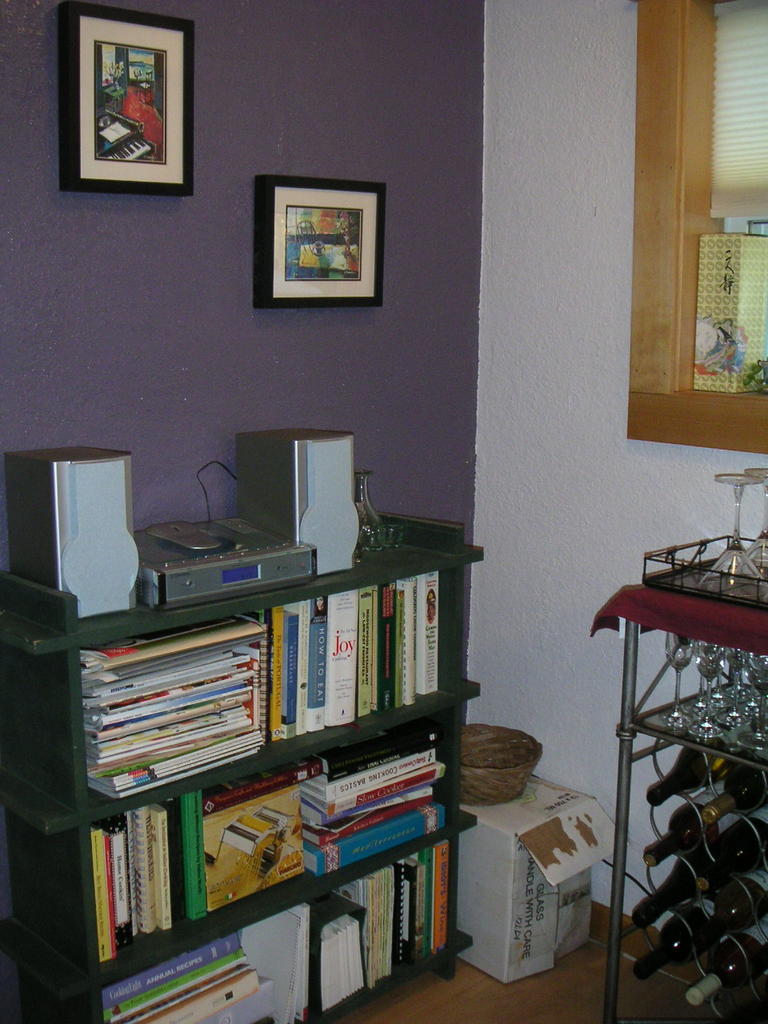
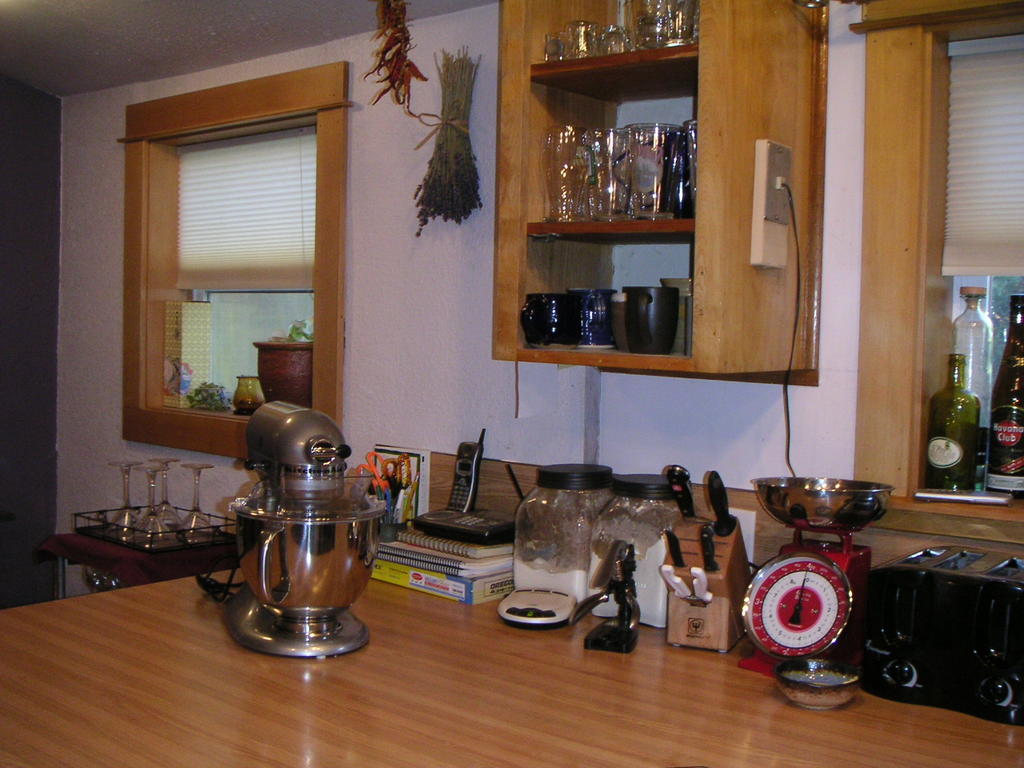
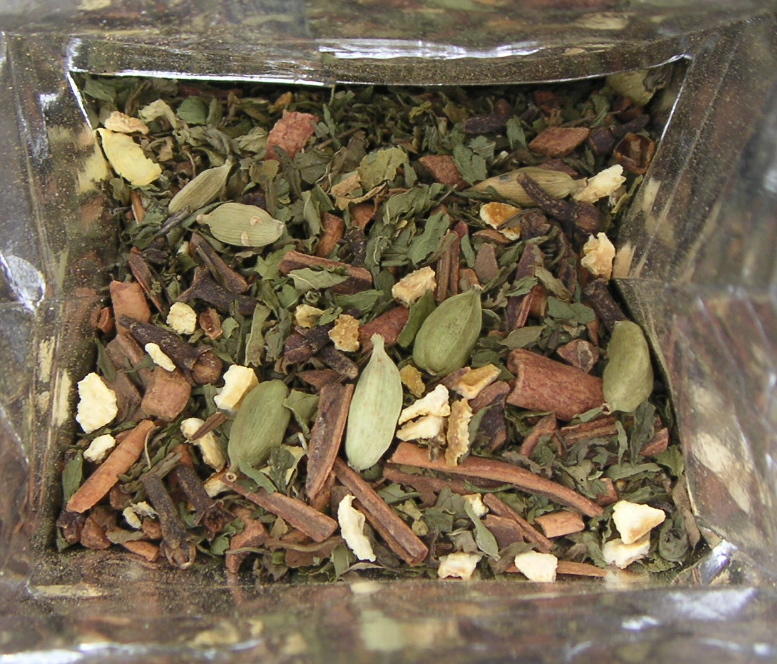
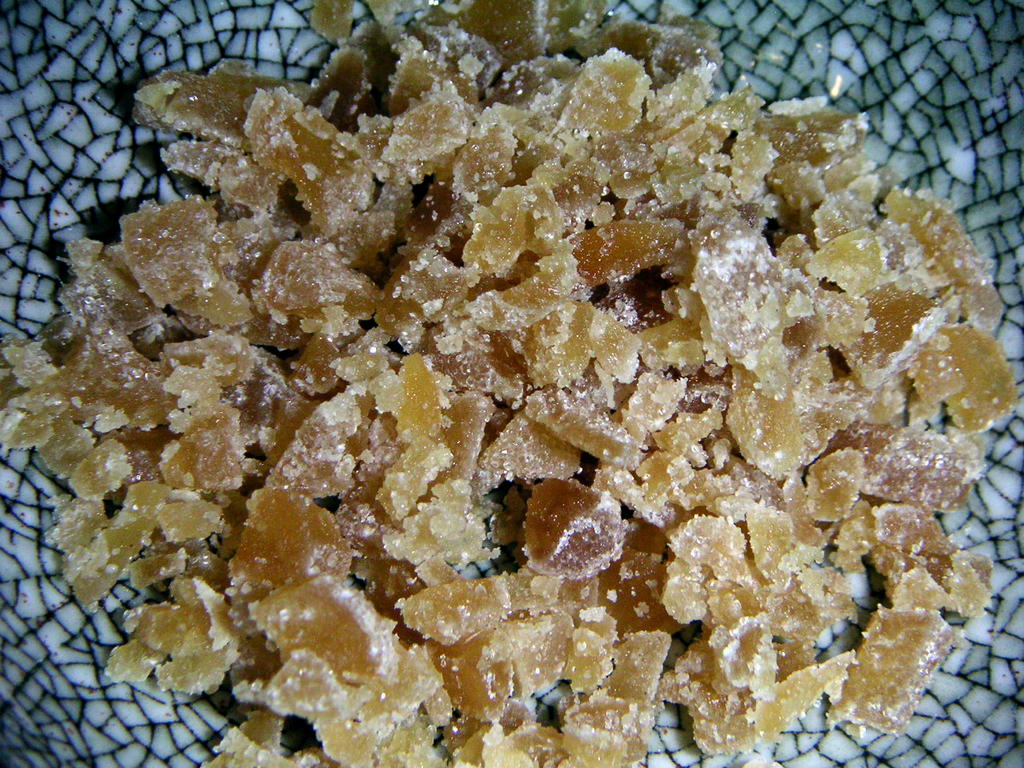
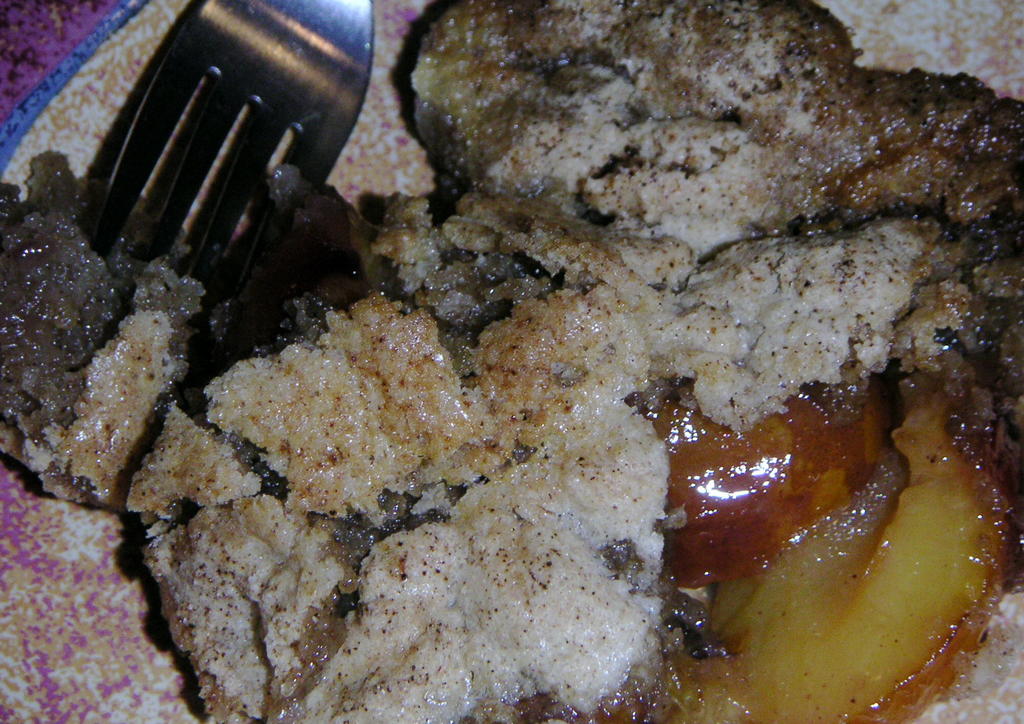
I have no idea if I would be 'friends' with all of you had we met on the street, though I'd like to think I would, but I know that I have come to care about you and think of you as my friends -- regardless of the fact that I've never met (most all) of you. I also know that food, and blogging, has brought us together...and I'm so thankful for that. Thankful for you. And thankful for the new deepness and richness that this world has brought into mine. I hope you all are having a most wonderful weekend day, and I hope that someday some of you will be able to come and sit in my kitchen with me, let me pour you a cup of tea, feed you a freshly baked scone or a piece of pie, and talk with me for hours.

21.10.05

Roasted bosc pears with pomegranate glaze


This is one of those desserts I pull out of the recipe box whenever I want to impress my guests, as it looks so elegant and has a deep, rich, burgandy color that is just beautiful, and plus, it's incredibly easy. I especially love the way the orange zest sticks to the sides of the pears. My parents were in town this weekend and I made this dessert their last night here (perhaps in an effort to lure them back sooner rather than later?). The recipe is from last year's October issue of Bon Appetit, and the picture here just does not do it any justice whatsoever. Dumb kitchen lighting!

Here's how to make it:
Roasted bosc pears with pomegranate glaze, from Bon Appetit

Ingredients:

4 bosc pears, with stems intact (Make sure they're ripe - they should give slightly at the top, near the stem, and smell like pears...stick them in a paper bag for a day or two if need be. There were a lot of complaints on the web site about this dish taking longer than the recipe says, but I think they just didn't let their pears ripen! Every time I've done it, the pears have been very tender at the end of an hour)
3/4 cup of dry red wine (syrah, or zinfandel, but I've also used merlot)
3/4 cup of pomegranate juice (I use POM)
1/2 cup of sugar
2 tsp. grated organge peel (or strips of orange zest is what I usually do as it looks prettier)
1 cinnamon stick, broken in half

To serve: vanilla bean ice cream, and biscotti if you'd like

Preheat oven to 350F. Place everything but the pears in a small saucepan over medium heat and stir and cook until sugar dissolves (about 3 minutes). Peel the pears (Leave the stems intact! This is what makes the dessert so pretty!) and scoop out the core from the bottom with a melon baller or teaspoon. Cut the bottom of the pear off slightly to flatten it so that it will sit up straight. Then, place the pears in an oven-proof dish standing up, and pour the sauce over the top of them. Place it in the oven and cook for 1 hour, or until tender, basting the pears with the sauce every 15-20 minutes. Transfer the pears to a serving platter or plates or bowls (I do bowls) and pour the sauce back into the saucepan. Simmer until reduced to 2/3 cup, from 5-10 minutes. Spoon glaze over pears. Serve with ice cream and biscotti.

Bon Appetit uses this amount of sauce for 6 pears, but I like having the extra sauce with the ice cream. Enjoy!

20.10.05

For Ilva

This is for Ilva...she thinks I'm organized, so I decided to show her one of my 'other' drawers!

19.10.05

Everybody else is doing it...


This began as a way to assuage Vickie's curiosity, and because everyone else out there seemed to be jumping on the bandwagon after the hilarious kitchen post by Belly-Timber, but
now I've been tagged by Ilva at Lucullian Delights for 'The Kitchen meme,' so no more procrastinating! I started this post a while ago, but it took me some time to clean my kitchen (far too messy to let others see!) and since the parents were here this weekend (lots of good food to post soon) it was the perfect excuse. So, this is where I do all of my creating...er...recipe following.

Meme Question #1: Show us your kitchen, and tell us what it is about it that ref
lects your personality.

When Loving Boyfriend and I decided to move in together, this house (we're renters) happened to be one that had just popped up in the ads. Loving boyfriend loves to tell the story of how when we walked in the door, he had to pick my tongue up off the floor and cap a hand over my mouth so that the landlords wouldn't charge us an arm and two legs for it because they could tell I was taking it, no matter what. Well, I knew it was the one as soon as I saw this kitchen.


Living in many rentals over the years as an almost-poverty stricken student, I've had some especially crappy kitchens. Ones where you could turn around from the stove and band every extending body part on some counter or another. The list of reasons I've hated every other kitchen is long: No storage space, no counter space, no chopping space, no dishwasher, sharing it with 5 other people, etc. etc. etc.


So this is like having a newly remodeled rental dream kitchen...sort of. It's delightfully spacious, has lots of storage (though, one could always have more!) space, room for my chopping block, and best, our roommate is never home so I just take up as much space as I want and pretend that his one cabinet doesn't really exist :) It fits my personality as much as it can for a rental kitchen for all these reasons, but mostly because it's stuffed full of things I love. I can't complain, really, about anything…though I haven’t yet figured out where my newest purchase – my Kitchenaid mixer – my dream kitchen appliance that I haven’t even had long enough to use yet – should go. Right now it’s just sitting in the middle of the counter so I can look at it and drool and imagine all the goodies I will make…once I pick out all the little Styrofoam pieces still stuck to it and figure out where it’s going to live permanently.The kitchen does have it's little idiosyncrasies - don't we all? It took us almost all of a year to buy an oven thermometer to discover why cakes didn't rise and we burned almost everything...the oven is about 110 degrees too hot (no kidding). But we've worked around that. The only other complaint I've had is that the mice used to get into one of the cupboards last year (we nixed that pretty quick - EW...but they're not as bad as the rats we've had in other rooms - though thank goodness not in kitchen...but that's another story). Oh, and we have burn marks on the counter...and the floor....


This is quite a story...we let one of our graduate school friends (he has his PhD now, believe it or not) asked us if he could live with us for a month (it's a four bedroom house) - he ended up staying for almost 6 months. Just about 2 weeks after he moved in with us, W. (fitting, no?), came home a bit toasty one very late evening – or perhaps, very early morning - and decided he was going to make some pasta. W., PhD that he is, fell asleep on the couch after he stuck the pasta in the pan on the stove. Now, unfortunately, this was before we’d bought the oven thermometer and had just that evening taken the bat
teries out of the smoke detector – it was so hot that just having the oven on was enough to set them off – and forgotten to put them back. (I know, I know, this is why we bought the thermometer!) W. woke up to the house filled with smoke (we were sleeping soundly in our room, completely unaware), ran into the kitchen to see the pot on the stove bright red, and what did he do? Grabs it, and pulls it off the stove! Dripping molten aluminum all over the counter, the stove, and the floor! He didn’t wake us up, either. Just left a note on the counter for us saying – “I was cooking pasta…and…I’ll pay for it.” The house smelled AWFUL.

We banned W. from cooking past 9pm, or if he’d had a single beer, for the rest of the time he was living with us…not even toast, not even using the microwave. The best part of the story? When W. was explaining what happened to us…

“Well, usually when this happens, the smoke alarm goes off and wakes me up before the pan melts!”

I almost killed him. USUALLY???? I still want to kill him sometimes. I guess a PhD doesn’t mean “piled higher and deeper” with common sense!

Anyway, that’s my kitchen, short story long.


Here's the rest of the meme:


2) Open a cupboard, take a picture, and tell us what's inside.


This was hard. These are my three favorite drawers:

Spice drawer: this is right by the stove and a great way to store spices!

Goodie drawer: for all my fun food 'finds' - dried morrels, candied violets, neat spices like smoked paprika, truffles, and lavender.

Tea and chocolate drawer: A perfect combination!


3) Your favorite kitchen appliance: The kitchenaid mixer - I haven't used it, but I know it will be!


4) Take out your favorite ingredients, the one you always have stored. This is hard. A very short list would include: Tellicherry peppercorns, heirloom tomatoes (when in season), garlic, shallots, steel-cut oats, olive oil, basalmic vinegar, canned tomatoes (when tomatoes aren't in season), coffee and dark chocolate.


and finally,

5) Your favorite cooking/baking recipient

This would have to be the Kitchenaid again...I don't have any nice casserole dishes or great pans (yet! someday!)!

Now I have tag four people...do I know four people who haven't done this? Whose kitchen am I dying to see? How about...

Brownie Points
la dolce vita
Zen Foodism
Gluten Free Girl

Tag! You're it!

12.10.05

...wait, exactly what do you do with a duck???


It's far too late for Paper Chef #11, as life sometimes gets in the way of trying to keep up on all desires and obligations, but I was intrigued by the ingredients this month: Duck, nut butter, ginger and pears. I was also both encouraged and inspired by my friend Ilva, at Lucullian Delights (who posts the most gorgeous pictures of her homeland in Tuscany every single day - so go check her out and dream a little), after seeing her yummy entry of duck meatballs. When I confessed to her that I had never tried cooking with duck before, she told me to give it a try - so I did. I came up with this: A warm 'salad' of soy-drizzled duck breasts on warm frisee with chanterelles, candied ginger, pears and walnuts.

Now, there are things I would change about this dish - part of it goes together quite nicely (frissee, soy, ginger, chanterelles and duck) and part of it I would leave out next time (walnuts - I'd use almonds instead, and perhaps pears - substituting orange segments or plums or something, oh, and I added bacon, which I would also leave out), but I would make something similar to it again. Plus, I think it's interesting to see both sides of people's creative adventures in the kitchen. I'm an avid recipe follower...in fact, I don't even know how to not follow a recipe. I freeze up, freak out, run frantically around the kitchen, screaming. Okay, not quite that bad. Sure, sometimes I'll throw a pinch of salt, rather than measure it, or if I'm out of something, substitute what I do have or leave it out entirely, but I pretty much follow the 'rules.' I'm working on this...making my own stir fry sauces, etc. But I have yet to make up my very own whole recipe.

Loving Boyfriend often scoffs at my 'rule-following nature.' While I take the crosswalk, he'll walk right out in front of traffic (JAYWALKER!!). I'll follow the signs that say 'DO NOT put THAT here' or 'DON'T SIT HERE,' while he pretty much ignores all signs and does whatever he feels like...especially any signs that tell him what to do. He's pretty much that way in the kitchen too, which I envy in many ways, as most of the time his adventures comes out tasting quite good...course, there was that one stir fry with vinegar and plums...which both of us agreed we would never eat anything resembling it again. :)

So, here's my first adventure: First, I roasted the duck breasts (425F for 20 minutes, skin side up, with the fat on, and several slits cut into the flesh that I drizzled soy sauce over). This is what Nigella Lawson said to do. But the duck breast sort of fell into the roasting rack and didn't cook thoroughly. So I removed the fat and pan seared them in oil on both sides for about 2-3 minutes each side (I have no idea if this is how to cook duck - but the roasting was taking too long and smelled funny!). Apparently, many people prefer to eat duck slightly rare or at least pink in the center to keep it moist and tender, so I followed suit and I have to say, I think I prefer it this way as well. I cut a single breast into thin slices (one breast made this salad and the other I think will be cold duck sandwhiches with mayo - we do this with leftover chicken and it's always good, so I'm crossing my fingers. Besides, Nigella says it's good!).

I laid the duck atop frisee that I tossed with olive oil and soy sauce before wilting in a saucepan (don't know if you're supposed to really do this either, but I think it was amenable to the cooking). Then, I topped this with pan-fried chanterelles, bacon (don't do this), finely chopped candied ginger, and pear slices (I'd leave this out too). I would also maybe add thinly sliced scallions next time...hmmm... We drizzled the whole thing with truffle oil, because I wasn't sure what to top it with, and it was pretty tasty. I might drizzle it with something else next time, but I'm not sure what...any ideas would be appreciated, or any suggestions to make this all-around better or different. All in all, it was a fun night - I made a complete disaster of the kitchen, and it took much longer than I though it would trying to do everything at once, but the end result was at least tasty (once I picked out the bacon and ate the pears separately...). Hopefully this will be the beginning of a new, adventurous me, where someday I can toss aside those recipes and use them as guidelines, not rules...but I don't think you'll find me walking out in traffic any time soon!


10.10.05

Azuki Bean Mousse...or, the not so pink mousse


I had thought this would be my entry into In the Pink last weekend, but when all was whipped and chilled, it just didn't look as pink as I had remembered it (of course, it was dark that night and we were eating outside by candlelight, but anyway...). But, it's still tasty, and an authentic Japanese recipe, courtesy of our friend Keiko here in Eugene, so I wanted to share it with you.


Azuki Bean Mousse

200 g sweetened red beans (see above; the can we bought was 210 g)
5 g powdered gelatin (about 3/4 of a bag or try your best to guess if you don't have a scale)
1/3 cup water
1/2 cup whipping cream
4 ramekins (6 oz. ones worked great; plus, I used this as an excuse to buy them :)


Place the water and gelatin into a large bowl and set aside. Put the whipping cream into another bowl, and start whipping (we had to use a whisk, since the beater is broken). Whip only until it's about 60% whipped or hangs onto the beaters or whisks, but still drops off after a few moments. Place the gelatin/water bowl into a hot water bath until the gelatin dissolves, then add the can of red beans and mix gently but thoroughly (try not to smash the beans). Next, prepare a cold water bath, and add the mostly-whipped cream to the bean mixture and mix again until thoroughly mixed (but gently!). Pour equal amounts (quickly) into the molds and put them in the fridge until chilled (about 1 hour). These look great garnished with cherries cut in half and placed around the outside, or you could save some of the beans and put them on top, or whipped cream, or just be creative!


A Perfect Fall Meal


Another Challenge recipe from the Four Seasons Cookbook…after our last debacle (which luckily, we were able to save with some Captain Morgan’s – in the dish, not us, believe it or not - a can of coconut milk and a LOT of curry powder), we haven’t been very good at keeping up with our 3 recipes a week goal in order to get through the book within a year.

But then I found these gorgeous white chanterelle mushrooms from my favorite market vendor (whose name is Freeman, I found out this weekend). Thus, the cookbook came out, and lo and behold, we were able to put together a perfect fall meal: Mushroom and Pancetta Pizzas and Roasted Butternut Squash Soup with Toasted Walnuts. The pizzas are tasty and crispy, and go perfectly with this simple, rustic, and low-fat soup.


Mushroom and Pancetta Pizzas
from The Four Season’s Cookbook, by Shirley Gill
Serves 4.

For the crust:
2 cups all-purpose flour
1/2 tsp. Salt
1 tsp. Dried yeast
2 tbsp. Olive oil
2/3 cup warm water

For the topping:
4 tbsp. Olive oil
2 garlic cloves, crushed
8 oz. Wild mushrooms
3 oz. Pancetta, roughly chopped
1 tbsp. Chopped fresh oregano
3 tbsp. Grated parmesan cheese
salt and pepper to taste

1. To make the crusts, put the flour, salt, and yeast into a bowl and mix thoroughly with a whisk. Measure 2/3 cup warm water and add the olive oil to this. Add the water and oil to the dry ingredients and stir with a spoon until mixed. Loving Boyfriend, who made the pizzas for us, contends that he would add some dried oregano and rosemary to the dough next time. Turn the dough out onto a lightly floured surface and knead until elastic. Place in an oiled bowl and cover with plastic wrap. Leave in a warm place, and allow the dough to rise for 1 hour or until doubled in size. (You could start the soup now.)

2. Turn the dough out onto a floured surface and divide into four pieces. Roll out each piece of dough thinly into a 5 inch round. Place the pizza bases on a lightly greased baking sheet and set aside. Alternatively, you could dress the pizzas and then cook them on a hot pizza stone, as we did.

3. Preheat the oven to 425F. Heat 2 tbsp. Of oil in a frying pan and gently fry the mushrooms and garlic until tender. Season, then cool.

4. Brush the pizzas with 1 tbsp. Oil, then spoon the mushroom/garlic mixture onto each pizza. Scatter the pancetta and oregano over the mixture, then sprinkle with parmesan. Drizzle over remaining oil. Bake 10-15 minutes or until crisp.

Roasted Butternut Squash Soup with Toasted Walnuts, from Cooking Light
Makes 8 one-cup servings.

8 cups cubed (1 inch) butternut squash – about a 2 1/4 lb. Squash
1 1/2 tsp. Olive oil
3/4 tsp salt, divided
1/2 tsp. Freshly ground pepper, divided
cooking spray
4 cups warm 2% milk, divided
14 oz. of homemade chicken stock – or commercial chicken stock or broth
1/4 cup of chopped walnuts, toasted

1. Preheat oven to 400F.
2. Combine squash, oil, 1/4 tsp. Salt, and 1/4 tsp. Pepper on a foil-lined baking sheet coated with cooking spray. Bake for 45 minutes or until tender (no need to stir unless sides begin to burn – you want the brown edges).
3. Place 1/2 squash, 1/2 the milk and 1/2 the chicken stock into a blender and process until smooth. Pour into a large saucepan. Repeat with remaining squash, milk and stock. Heat gently over medium heat for 5 minutes or until warm (do not let boil). Stir in remaining salt and pepper. Ladle into warmed bowls, then sprinkle each with 1 1/2 tsp. nuts.


9.10.05

Yay! I get to brag about my dogs! WDB #4


It's that time again, time for Weekend Dog Blogging - Check out Sweetnicks for the round-up!

This is Samson, again, but this one was when he was only about 3.5 months - and 35 lbs. He's showing off that little face that just makes me say, "Awww...you're so cute. It's okay that you just ate the heels out of my favorite shoes and then licked my face after eating poop."Ew.

In the Pink


It's time for In the Pink! A few weeks ago, Emily at La Dolce Vita came up with the fantastic idea for foodie bloggers (like ourselves) to cook something pink in an effort to bring about awareness of breast cancer. Loving boyfriend and I were intrigued, especially because I have a great aunt, Shirley, that has had breast cancer. Shirley is one of the strongest, most vibrant women I know, so I'm dedicating my creation to her.

My first attempt at cooking pink was a trip down memory lane to a dinner made my my dear friends Willis and Keiko. Keiko is Japanese and just recently moved to Eugene. For dessert, she had made a very unique Azuki Bean Mousse and both Loving Boyfriend and I remembered it being pretty and pink. So we got the recipe, made the mousse, and low and behold, it wasn't very pink...it's more of a brownish pink. I'll still post the recipe, because it's a tasty, unique dessert perfect with any asian food, but I'll post it later.


So, in an effort to redeem ourselves with not much time left, we made a special batch of very pink Rhubarb Schnapps. The picture actually doesn't do it justice as it's a very bright pink in the jar. I can't tell you yet how it tastes, because it has to mature for at least 6 weeks, but it is easy to make, pretty, and pink.


Rhubarb Schnapps,
recipe from Nigella Lawson, How to be a Domestic Goddess

Approx. 2 lbs of rhubarb, (1 1/4 lbs. trimmed)
1 1/3 cups of sugar
1 Liter of Vodka, plus a bit more if needed
2 one Liter jars
1 one Liter bottle

Chop the rhubarb and divide it between the two jars. Add 3/4 cup sugar to each jar, put the lids on and shake them vigorously. Unclip the lids and pour 2 1/4 cups of vodka - I used a cheap vodka, as she claims she does in the recipe - into each jar to fill. If this doesn't fill them, pour in a bit more.

Close the lids, put the rhubarb vodka somewhere cool and dark for at least 6 weeks and up to 6 months. If you remember, shake the jar each day or so for the first month (this makes it even more pink!).

Strain into a pitcher, then pour into the bottle. Makes 1 Liter.


7.10.05

Pacific Northwest Huckleberry Goodness & The Street Fair


Huckleberries, or Vaccinium membranaceum for my Swedish friend in Tuscany, are a particular treat this time of year in the Pacific Northwest. Apparently, the little berry has yet to be truly domesticated because it is difficult to grow and does not last long after picking, so it does not ship well. Most huckleberries are picked, by hand, in their native habitat. I buy them - many pints of them - every year from the same farm stand at the Saturday Market (a market that has both crafts and produce in our downtown area that is every Saturday from the May until December). I love this particular stand. The man - and I used to know his name so I feel terrible that I can't remember it this year - who is not a 'farmer' per se, sells mostly dried gourds, and so is often over-looked by many people. Instead of your usual produce one would grow in the garden, he goes out every Friday and picks huckleberries or elderberries, or gathers black chantrelles (the best there are!) and baby porcinis (king boletes) from the forest. Most weekends, his is the first stand I check, because he sells out of his treats fairly quickly, since he has items that most of the stands don't.

Our favorite thing to do with huckleberries is to make 1/2 apple 1/2 huckleberry pies. This very versatile berry, however, would make wonderful jam, or used in place of blueberries in many dishes. They can range from slightly tart to truly sweet, and the best part is that
you need not try and remove any of the tiny stems or green berries, just dump the whole lot of them in whatever you're making, because it all cooks down together. Last night, inspired by a post from Kitchenmage a while ago, we decided to make a huckleberry sauce for salmon. You'll have to play around with it a bit because we just kind of threw things together, so the measurements are all approximate, but it tasted divine. You could probably use black currants or blueberries or raspberries too...

Huckleberry Sauce for Salmon, our own creation, but inspired by Kitchenmage

1/2 pint of huckleberries

1/4 cup of sugar
1 tbsp. fresh lemon juice (or use a tsp or two of fresh lemon zest - this might even be better!)
1 tsp. fresh thyme
1 jalapeno (seeded or not depending on your taste)

1 tbsp. cornstarch dissolved in 1 tbsp. water

Add the first 5 ingredients (through to the jalapeno) in a small saucepan and cook for about 5 minutes over medium heat. Then add the cornstarch solution and simmer another 5-7 minutes until thickened. Serve over grilled or baked salmon that is still slightly pink and tender in the middle (ours was grilled). This is enough for at least 4 servings - possibly more depending on how big your servings are :)

---------------------------------

The Street Fair


On another note, this week on campus is the Street Fair - twice a year we're blessed with three days of all kinds of food and crafty goodies from vendors...a very welcome change after eating at the same few (not-always-so-tasty) places the rest of the year. Students come out in droves for the Afghani food, Peruvian food, BBQ, Thai, and Mexican food just to name a few. This year, my lunches at the Street Fair were limited as puppy parenthood requires going home in the middle of the day to let the pup out. But the one lunch I did have there was fantastic - the best I've had so far in three years of trying out food vendors there.

The one I tried this year was: Azure Blue's fish tacos. This is a new vendor to the Street Fair. They served up all organic vegetables with sustainably harvested, seared albacore tuna on soft white and yellow corn tortillas. On the side, there were sugary red onions (Ever made these? yummy! Just thinly slice a red onion and cook it in a little bit of water and sugar...they turn a gorgeous shade of pink!).


I also couldn't resist a slice of their vegan wild harvested blackberry pie with a raw hazelnut crust - the best bite was definitely the lone whole wild blackberry placed on top. The crust was really good - like smashed up hazelnuts coated in butter.


My one weakness with the street fair (besides wanting to eat at it every day for lunch) is the loose- leaf tea from Herbal Upbringing in Portland. I buy at least two bags every time the Street Fair comes around. This time it was a Spicy Spearmint blend with spearmint, orange peel, cloves, cinnamon, cardamom, peppermint & love :) and an organic Woman's Brew containing red raspberry leaf, nettle leaf (have you tried nettle tea? it's great; and available in most health food stores), alfalfa leaf, spearmint, rosehips & love. The picture is of the Spicy Spearmint. I was walking around with my nose stuck in the bag the whole way back to work.
Plus, I just love that I can actually identify the ingredients by sight too (though they are listed on the bag).


Check out Brownie Points - since she's another Eugene foodie who just happens to be here on campus, she might bless us with her version of the street fair too! Of course, she may actually be working harder than I am and not had a chance to go yet, but her site is great too!

6.10.05

She was right...it's pretty d@mn good!


Shauna, over at Gluten-free Girl, posted this recipe a few days ago, calling it "The Plum Crumble of My Dreams." With a name like that, it had to be tested. Unfortunately, I've been looking for Italian plums at the farmer's market the last two weeks and the plums that were once so plentiful (seems like just a day ago!) are completely gone! So I settled for the only plums I could find: pretty little greenish-gold plums that I already forgot the name of (sorry). It also took me a day or two to replenish my stock of candied ginger since I was completely out. But then, finally, last night, I had all of the ingredients in my midst. It's a simple recipe; the only change I made was to reduce the amount of butter from 1/2 cup = 1 stick = 8 tbsp to 5 tbsp. because I've been feeling rather guilty for the high amounts of cream and buttery yummy-ness that has been prevalent in my food choices of late. It still turned out perfectly. The most difficult part is finely chopping the ginger, and even that isn't too bad.

The plum and ginger combination is perfect, and the crust is really like a crispy, slightly-crunchy crunched up cinnamon crispy (okay, sounds redundant, but like those 'cinnamon crispies' you used to be able to get at Taco Bell...only better, waaaayyy better...and laid over juicy sweet delicious plums. And I refuse to eat at Taco Bell these days - I've never been a huge fan of fast food, nor soda or pop or whatever you call it in the part of the country you're living in (this is a point of contention in some areas, such as here). Loving Boyfriend got food poisoning last Christmas from McDonalds so we don't eat at fast food places anymore...even in desperate times).

Both boys (roommate and Loving Boyfriend) gave rave reviews after I doled out scoops for them as they finished their chores (I actually took a picture of this to document it and use it for blackmail sometime in the future...two boys folding laundry in the living room together! I wasn't aware men actually knew how to do laundry...I love you, Honey, and I do appreciate you doing the laundry last night...for once...).


BTW - stay tuned for In the Pink next week - Loving Boyfriend and I have our recipes and we're primed to start cooking Pink!

5.10.05

Pumpkin custard-filled pastry shells with maple caramel syrup


With Fall fully upon us, pumpkins have been on everyone's minds. With posts like those from Gluten-free Girl and Bakingsheet, by this last weekend I was starting to really crave my own pumpkin treats. I had two small cheese pumpkins left over from the CSA and decided I was going to make a pumpkin puree with them. Envisioning the pumpkin pie, pumpkin cheese-cakes, and pumpkin pancakes I could make, I sat down on the couch and surrounded myself with all of the old Thanksgiving editions of the magazines I had in the house - I figured that this was as good of a place to begin as any. I came across recipes for sour-cream pumpkin pies, pumpkin whoopie pies, pumpkin muffins and bread, and finally, this little jewel in last year's edition of Bon Appetit: Pumpkin profiteroles with maple carmel syrup. The picture was of a crisp, flakey pastry with a deeply orange-brown caramel melting down it's side. YUM. I was sold.

First, I had to figure out what a 'profiterole' was: (from epicurous.com)

profiterole
[pruh-FIHT-uh-rohl]
A miniature cream puff filled with either a sweet or savory mixture. Savory profiteroles are usually served as appetizers.

...and with the afternoon sun coming through the window...


...and a day full of other cooking projects in the works, I decided to take the easy road, and purchase puff-pastry shells instead (yeah, yeah, I know I said a day or two ago that I wanted to make everything from scratch, but hey, only so much cooking can fit into one rainy weekend! Plus, I am currently without a beater since I accidently poured my gingerbread batter into the little openings to the motor two weeks ago...but that's another story...and a good excuse to finally order that kitchaid I've been wanting...and Loving Boyfriend won't be able to stop me...ha ha ha ha ha).

So, on to the pumpkins...pumpkins are members of the gourd family, meaning that they're related to squash and watermelons (I didn't know that!). They're a great source of vitamin A, and can be used in place of any winter squash in a variety of recipes. Smaller pumpkins will generally be more
tender and have a better taste than the larger sized ones, and if you can, don't go with the jack-o-lantern variety. To roast them, chop them into large pieces, leaving the skin on, and place them in a baking sheet (with a lip) face down in about a 1/4 inch of water. Bake them at about 400F for approx. 45 minutes. Alternatively, you could place each piece in tin-foil, tightly wrapped, with a splash of water or butter too. Once it's finished, take it out of the oven and unwrap them, letting them cool. After scraping it from the skin, you can then mash the pumpkin or put it in a food processor with just a pinch of salt. Viola! No more canned pumpkin for you! Just homemade pumpkin puree...freshly made or frozen. And as always, organic and farm-fresh will always taste better.

Next, the custard: (from Bon Appetit, but 1/3)

Pumpkin Custard:
1 cup whipping cream
3/4 cup of freshly made pumpkin puree
1/3 tsp. ground cinnamon
1/3 tsp. ground ginger
1/3 tsp. ground allspice

dash of cloves
dash of salt
1/4 cup of sugar
3 large egg yolks

Preheat the oven to 375F. Whisk cream and next six ingredients together in a medium saucepan. Bring to a simmer over medium heat, stirring occasionally. Remove from heat. Whisk sugar and egg yolks together in a medium-sized bowl, and then gradually stir in the hot pumpkin mixture into the bowl. Pour into a glass baking dish (since you'll be mixing it up later, it doesn't matter how big, really), cover with foil and place in a larger dish with water up t
o 1/2 of the side. Bake until set in the center - about 45 minutes, and then cool completely (can be made up to 1 day ahead). This ends up tasting like a creamy, custardy pumpkin pie filling.

Okay...custard? Check.

Now here's the yummiest part.


Maple Caramel: (this will make more than you need; you could halve it or use 1/3 and still be fine)

1 cup maple sugar (you can find it in most health food stores)
1 stick of unsalted butter
3/4 cup heavy whipping cream
1/4 cup bourbon
1/4 tsp. vanilla

I actually forgot the maple sugar at the grocery store - can you believe that? So I just added a little maple syrup to the mix - which is why my caramel came out lighter colored than it would be with the maple sugar, but it still tasted excellent. I also used rum instead of bourbon because I had it on hand.

Stir sugar and butter over medium heat until well blended and smooth. Mix in the cream and bring to a boil, stirring until caramel bits dissolve. Reduce heat and simmer 5 minutes. Then remove from heat and add bourbon and vanilla. Return to heat and simmer 1 minute. (Can be made 3 days ahead).

Now, maybe because I didn't have all the same ingredients, or maybe I halved the recipe wrong, but I never had any caramel bits - I also let it simmer a bit longer until it turned a richer, darker caramel color, because it was really light in the beginning. It's also rather difficult re-warm because it separates.

To assemble, just bake the shells according to the package, remove the top and stuff with the custard, replace the top of the shell, then drizzle with the syrup. You could also garnish it with chopped nuts and fresh whipped cream, which would be divine...but again, I don't have a beater at the moment, so we just had them plain. These actually look and taste really elegant, so would be a unique way to serve guests a pumpkin-y end to a great autumn meal.

4.10.05

Grilled Radicchio and Basalmic Risotto


This dish came from my newly arrived Chez Panisse Vegetables, by Alice Waters. I love Alice Waters' philosophy, and this is the first dish I've created from this cookbook. I bought it specifically because we get all of these organic vegetables every week from our CSA boxes, and it's nice to know several (delicious) dishes that you could make with a single type of vegetable. The best part about the CSA is that everything is seasonal, and about as freshly picked as you can possibly get without picking it out of your own garden.

This risotto is superb. And easy; since Alice Waters' recipes tend to showcase in-season vegetables at the peak of their flavor, there aren't a lot of ingredients. Radicchio is a bitter green (actually, an Italian chicory) that looks very similar to lettuce. Sort of like a head of purple- and white-striped lettuce. Choose medium-sized heads, as a young, mature radicchio has a rich, spicy flavor that mellows when grilled (also good just chopped raw in salads), while it tends to get quite bitter as it grows older and bigger. It's also high in magnesium, potassium and vitamin A. Store it in a plastic bag in the fridge for up to a week.


Grilled Radicchio and Basalmic Risotto, from Chez Panisse Vegetables

1 1/2 medium heads of radichio
4 tbsp. extra-virgin olive oil
1 small yellow onion
3/4 cup dry white wine
1 1/4 cups arborio rice
1 1/2 to 2 quarts of chicken stock
1 stick of butter
2 tsp. basalmic vinegar
chopped parsley and shaved parmesan (for garnish)

Prepare the radicchio by removing any outside leaves that are wilted or damaged. Cut into 9 large wedges lengthwise and grill the radicchio over medium heat until lightly colored and wilted, but not charred. It did fall apart a bit on me, but I was still able to get most of it out of the grill (P.s. It's not fun to grill while it's raining!).
When cool enough to handle, chop roughly and set aside. Heat the chicken stock. Heat 3 tbsp. of oil in a large, heavy sauce pan over medium heat, and cook the onion until tender, but not brown. Add the rice and cook until slightly transluscent - about 3 minutes. Add the white wine, and when it is almost evaporated, add a ladle-full of the hot stock. Stirring often, each time the stock is almost absorbed completely into the mixture, add another ladle-full. After about 15-20 minutes, when the rice is still chewy but not cracked, stir in the radicchio, the butter and the basalmic. Cook for 3-5 minutes longer. The finished product will be slightly chewy. Garnish, and serve immediately. 4 Servings.

On a side note here, and yes, I am venting, if you should ever choose to do a CSA through a local farmer (and they are truly a wonderful way to support local farms and try lots of new and heirloom varieties of vegetables, so I highly recommend that you do), do get yourself a written contract from the farm. This is not something I ever really thought about, but we recently realized that our farmer, from Little Wing Farm here in Eugene, has just up and disappeared with the money that all of the CSAmembers paid for the rest of the season (through November, at $20 a week). It's very unfortunate, as we have been with him for almost three years, and even, I would say, had become friends and done activities with him not connected to the CSA. He's been seen around town by other farmers (thus we know something awful has not befallen him physically), but no one in the CSA has gotten any vegetables for three weeks, and not even the Lane County Farmer's Market consignment can help us. We were worried about him at first, giving him the benefit of the doubt, and have left several messages trying to contact him, but now have been forced into only the saddest and hardest conclusion...that there won't be any more vegetables, and that our relationship with this farmer is over. The director attempted to find out what was up, but when asked what they found out, they just shrug their shoulders, give us a sad look and say, "Sorry." Sorry, I guess you're just out of luck. I'm pretty sad about it, because I feel a bit betrayed by a friend (that's the worst of it, really...if he just would have called to tell us he couldn't do it anymore), and we're out the money which we don't have much of anyway, but we're counting our losses and moving on. So, please, don't let this happen to you.


3.10.05

Rainy days are perfect days for cooking

Winter in Eugene means rain...and lots of it. And even though it's not quite Winter yet, this weekend gave us a preview of what's to come in the months ahead and rained for most of it. Fortunately for me, lots of time spent indoors out of the rain means lots of time for cooking! I took full advantage of the opportunities the rain provided this weekend. :)


First, I tried a recipe I've been meaning to make for quite some time. Nic, over at bakingsheet, posted a recipe for English Muffin Batter Bread that intrigued me from the moment I saw it. I'm always a sucker for the thought of making things that I usually only buy at the store...breads, stocks, yogurt and ice cream account for some of them...and as you all know, homemade always tastes better. That said, I do have to say I am not at all opposed to taking shortcuts either and just buying something ready-made if I'm not in the mood to make it. But this recipe is stellar. After finding a few recipes for making your own english muffins - this is much easier. Most english muffin recipes require a second rise of the dough and you cook them on a griddle. The batter bread, on the other hand, is simple. It gives you the chewy texture of an english muffin, the yeasty taste, a gorgeous golden-colored loaf and the only regret that I have is that I only own a single loaf pan and so could only make one. This recipe is definitely going in the book and will be made over and over and over...I think my English muffin buying days are over for good!


Another culinary adventure I embarked upon this weekend was making my own granola mix. This is another item I generally just buy pre-made from the store. The recipe is originally from a Barefoot Contessa Food Network episode, but hers included shredded coconut (it would be wonderful with it), which Loving Boyfriend is not ecstatic about. I also chose only the dried fruits that were available from organic sources at my local PC Market of Choice (PC is awesome...you can get all the organic goodies you want, as well as your triscuits or cheetoes or Pepsi or anything else you want). Organic dried fruit (no sugar added) generally tastes far superior, looks better and tastier (more like a dried version of the actual fruit), and doesn't have any weird preservatives in it.


Homemade Granola, originally from Barefoot Contessa, but adapted by me

4 cups old-fashioned rolled oats
1/2 cup good honey (I used a white Hawaiian honey that I had bought on a trip to Hawaii; it has a slight gingery taste to it)
3/4 cup vegetable oil
1 tsp. vanilla
1 cup sliced almonds
1 cup raw pecan pieces
1 cup turkish apricots, chopped
1 cup dried cranberries
1 cup dried calamyrna figs, chopped
3/4 cup zante currants

Preheat the oven to 375F. Place the oil, vanilla and honey in a small bowl and whisk it together (this is kind of hard - I whisked and whisked and it would never quite go completely together, but it didn't seem to make any major difference). Mix together the oats, almonds and pecan pieces in a large bowl until well combined (add the coconut here if you'd like it too), then slowly mix in the honey mixture with a wooden spoon until it coats everything evenly. Spread evenly on a baking sheet, and bake until an even, golden brown. Let it cool completely. Note to self: If doing this on a Pampered Chef stoneware baking sheet, take the granola off of the sheet immediately after removing it from the oven so that it can cool...otherwise, it willburn on the bottom, even if taken out when perfectly baked...oops :) Mix in the remaining ingredients, and store in an airtight container. Makes about 10 cups. Combine this with some homemade yogurt, have a slice of English muffin batter bread with butter, and you've got yourself a breakfast of the Gods (or Goddesses!).

More of my adventures to come...


Yay! I get to brag about my dog(s)...#1

Well, the Internet decided not to work at my house this weekend, so this is a bit late, but hey, better late than never, right?

Weekend Dog Blogging #3 (and my first dog blogging event), thanks to Sweetnicks who put this whole thing together...finally, a chance to brag about my pup, like the proud parent I am...

This is Samson:


Isn't he sweet?

He's 5 months old.

And I love him very much. He melts my heart into a puddle whenever he looks at me with his multi-colored eyes and his tongue hanging out the side of his mouth.


He wakes me up every morning between the hours of 5:30 AM and 6:30 AM.

And most nights at least five times during the night too.

When he wakes me up, he does it by whining, barking, and jumping up on top of me in the bed.

He weighs a hefty 53 lbs.

At 5 months.

Which means he will probably end up being approximately 120 lbs when he is 1 year old.

He loves to chew things, eat poop, pull me around on the end of a leash, bark when he wants attention, and start play fights with our other dog, Cali.

Cali belongs to Loving Boyfriend.

This is Cali.


Some people have His and Hers towels, sinks, or rooms. We have His and Hers dogs, that match...His (Cali) and Hers (Samson). Well, they have very similar colors anyway.

Cali likes to sleep all day, chew quietly, and be lazy. Like us.

It was Loving Boyfriend's idea to get a puppy.

Good thing He's so cute.