


I'm orginially from Colorado, and I thought I would never see the day that someone else would agree with me that there is yummy sushi in Colorado...now, I know what you're thinking...
"WHAT???!! IS SHE CRAZY? THERE'S NO FRESH FISH IN COLORADO! HOW COULD THERE BE GOOD SUSHI? SHE MUST HAVE HIT HER HEAD WHEN THAT BLENDER EXPLODED!"
And the honest answer? I have no idea how Colorado can have good sushi. And truly, I prefer not to think about it and instead, just enjoy the fruits of the sushi chef's labor. The sushi I ate in college, the first sushi I had ever had, far exceeded any of the sushi I had while I lived in Monterey, CA for two years, and even in many places I've eaten in Oregon (though Hawaii beat the pants off any of it, and I now have some favorite places in San Francisco too).
But I did eventually learn, from a friend in Hawaii, and my friend Keiko here, and through lots of trial and error with Loving Boyfriend by my side, to make my own (although there is still much to learn!). Recently, my parents discovered sushi after a new restaurant opened up in my hometown, and I could think of nothing more bonding than to try and make it together while they were visiting us a while back (I started this post quite some time ago, but didn't finish it until our latest sushi soiree so that I could get better pictures of the process). Besides, we are blessed by having a large asian market only two blocks from our house where we can get all kinds of goodies for making sushi.
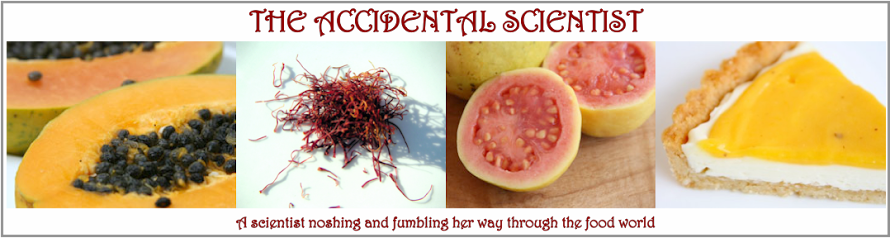
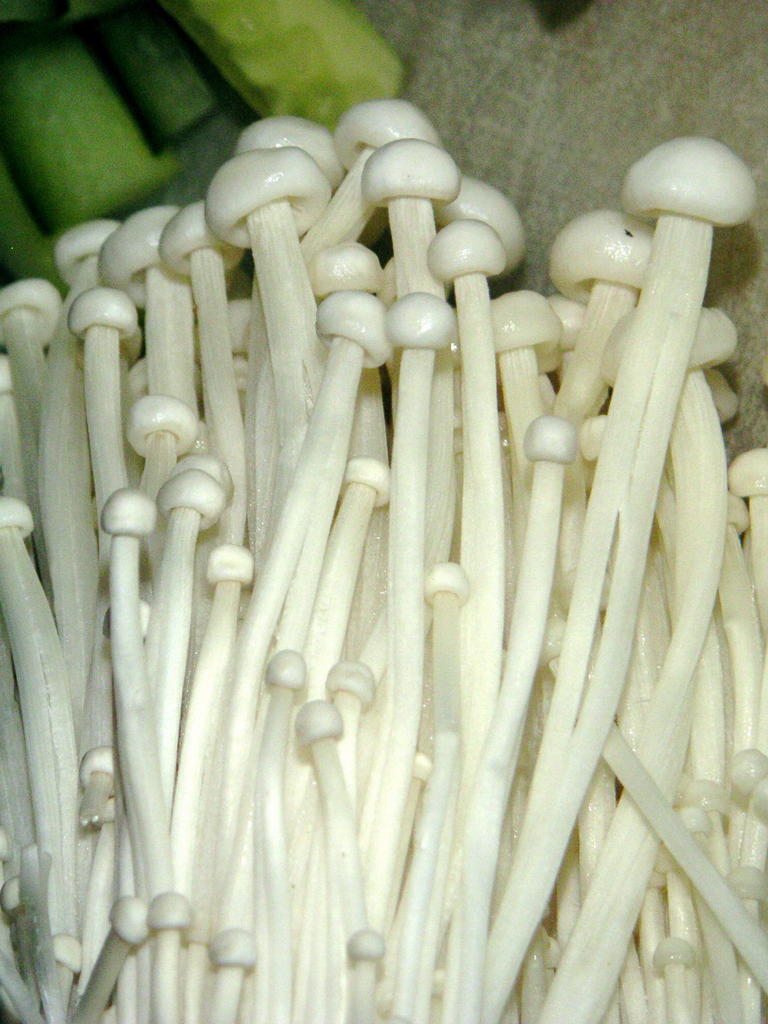
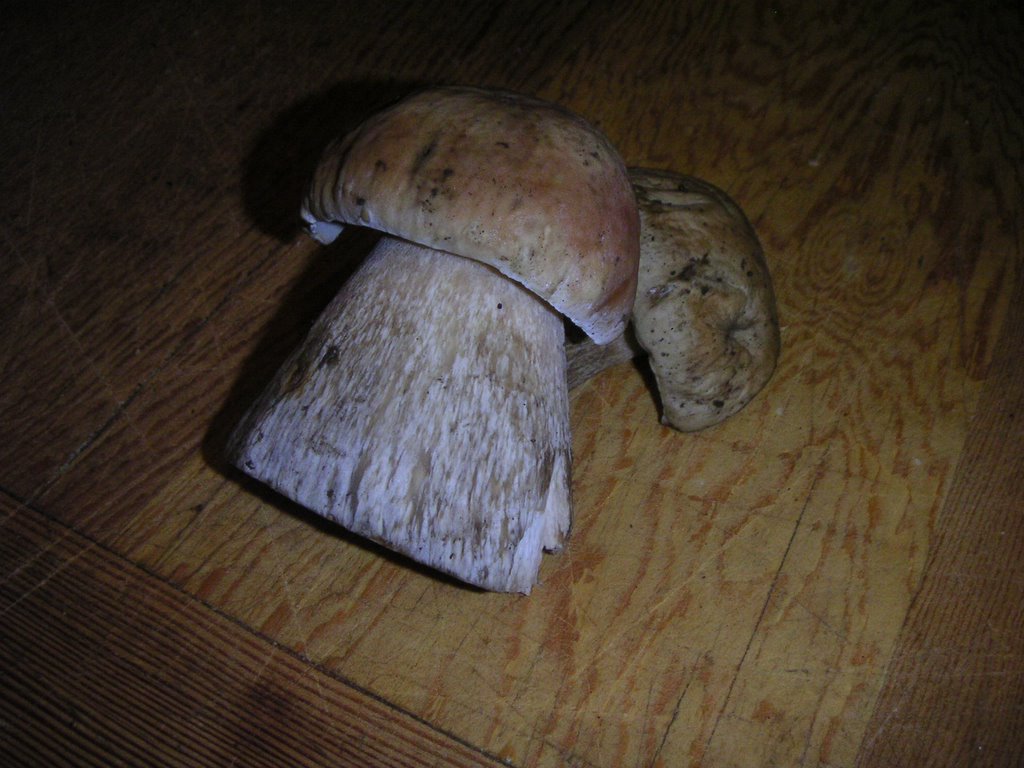
As part of the fun, we took them to the market and got broiled unagi (freshwater eel, we buy the seasoned kind), spicy daikon sprouts, sweet and succulent enoki mushrooms, mochi-covered ice cream in cappuchino, azuki bean and mango flavors, and a very big bottle of sake that the woman behind the counter helped us pick out. We even found fresh edamame (soybeans) still in their pods at the farmer's market and very fresh yellowfin tuna (for searing), salmon, and Dungeness crab meat at the fish market.
broiled unagi

daikon sprouts
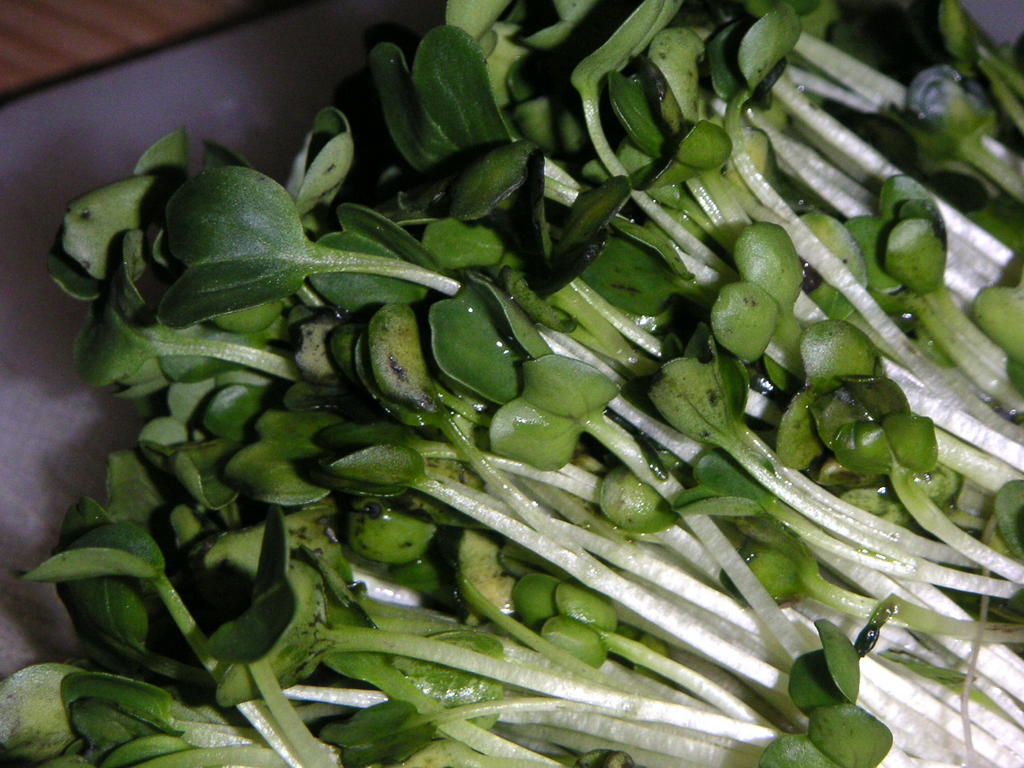
enoki mushrooms
edamame (just boil for 5 min, then salt)
You can pretty much put anything you want into sushi rolls. We usually cut up a mixture of sprouts, long matchsticks of carrots and cucumbers (english cucumbers work best, without the seeds), avocado, cream cheese (excellent with salmon), and the enoki mushrooms, sometimes even fake crab (I'm not sure if this has a 'real' name), tofu, freshly smoked and very thinly sliced lox, and the fish...lay it all out on a cutting board, then let our friends make their own rolls. Cut everything into long, thin strips. Sushi is a fabulous food to make with lots of friends - a perfect excuse for a party!

You can pretty much put anything you want into sushi rolls. We usually cut up a mixture of sprouts, long matchsticks of carrots and cucumbers (english cucumbers work best, without the seeds), avocado, cream cheese (excellent with salmon), and the enoki mushrooms, sometimes even fake crab (I'm not sure if this has a 'real' name), tofu, freshly smoked and very thinly sliced lox, and the fish...lay it all out on a cutting board, then let our friends make their own rolls. Cut everything into long, thin strips. Sushi is a fabulous food to make with lots of friends - a perfect excuse for a party!
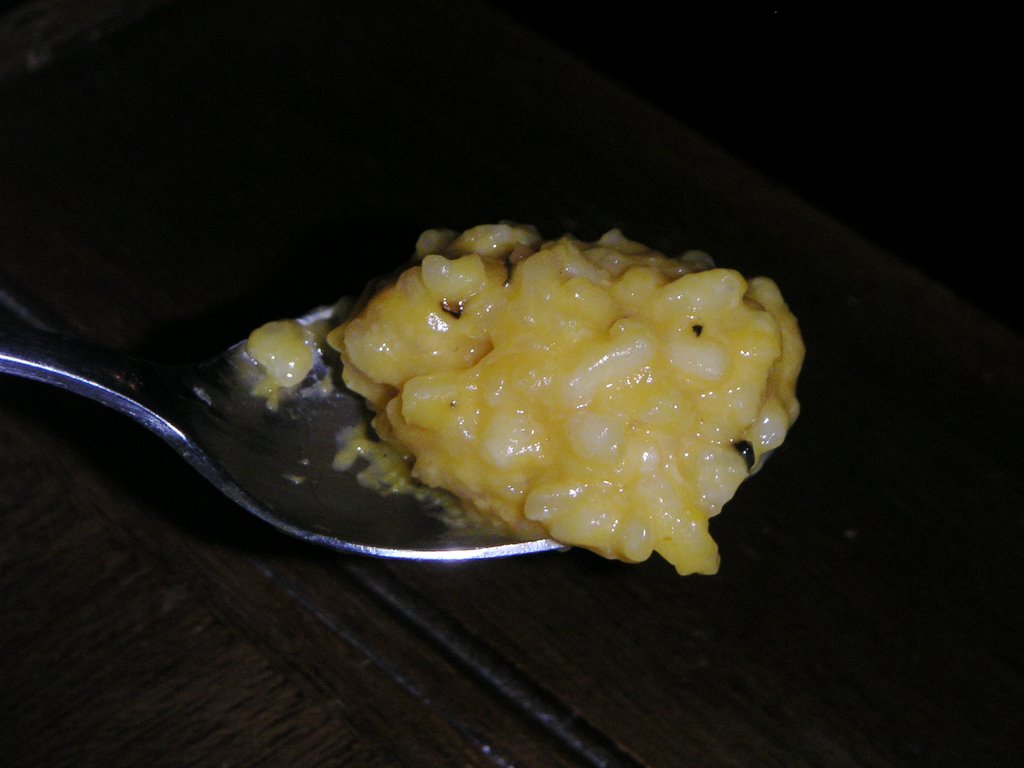
It does help to buy a couple of those bamboo sushi mats, but it's not necessary. Also, you'll want to buy a few packages of Nori, or seaweed, that's been toasted. You can get most of this stuff at your local grocery store...but do make sure that you buy the freshest fish available, and even ask if it's sushi grade. It should not have any fishy smell whatsoever...it should smell like the ocean (and no, not that rotting seaweed smell at the beach, the ocean...cool, clean saltwater on an ocean breeze). The rice is the most important part about sushi - you want it cooked, cooled and sticky! Here's the recipe we use:
Sushi Rice
1 3/4 cups sushi rice 2 cups water 6 tablespoons rice wine vinegar 2 tablespoons sugar 2 teaspoons salt
Wash the rice well and drain. Cover with the measured water and bring to a simmer. Cover and cook for 12 minutes then leave to sit for 5 minutes with the lid on. Meanwhile, heat the vinegar, sugar, and salt until dissolved then leave to cool. Turn the cooked rice out onto a flat tray to cool. When cool, place in a bowl, stir in the vinegar solution, and mix with a wooden spoon. This makes enough sushi for 4-6 people - and we always end up with leftovers (which I let Loving Boyfriend eat because I'm not so hot on leftover sushi), but you'll probably have to experiment to get the right amount every time. We're definitely still learning!
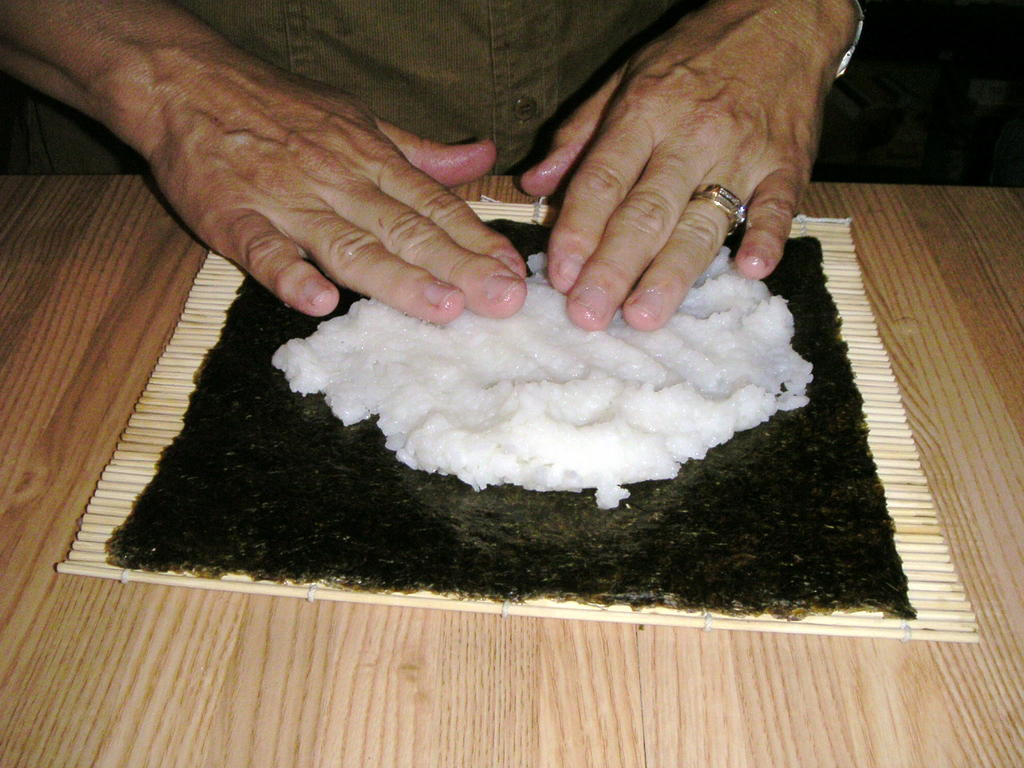
You want your work space as dry as possible - especially if you're not using sushi mats. Lay out your peice of nori in front of you with the shiny side down, on the mat if you're using mats. We've had debates aboutOnce you have everything cut up and laid out for accessibility, make sure your work surface is whether or not the lines should be perpendicular or parallel with the mat, but I really don't think it matters. Try both, and see what you think! Practice makes perfect, after all. Take a small bowl filled with warm water, dip your fingers into it (to keep the rice from sticking too much), and place a mound of rice on top of it. Using your dampened fingers, spread the rice in a thin layer (this first picture may be a bit much) out to the edges of the nori, leaving a few centimeters on all sides and about an inch towards the top. Like so:
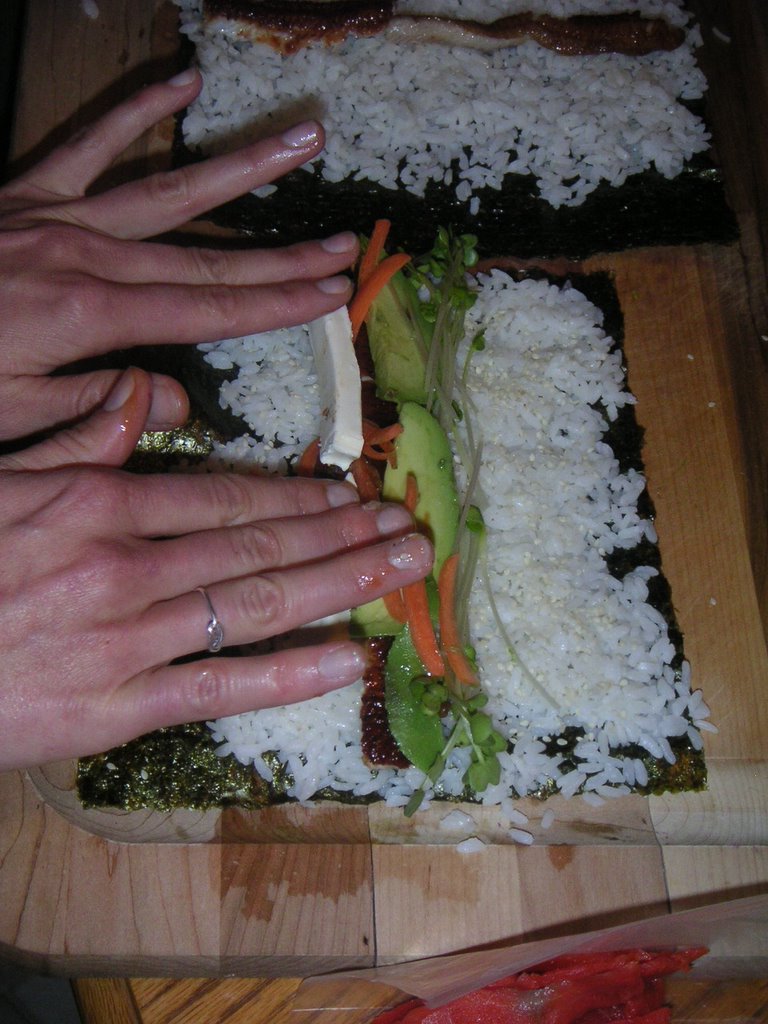
Next, lay out all your goodies that you want in the middle of the roll (not too much!):

Pat everything down so that it fits:
Then take the bottom edge of the roll and fold it over (in this picture, she's folding from the top, but I find it easier to fold towards the top, rather than from it...but then again I'm only 5'0," so this may have something to do with that - just do whatever is easiest for you).

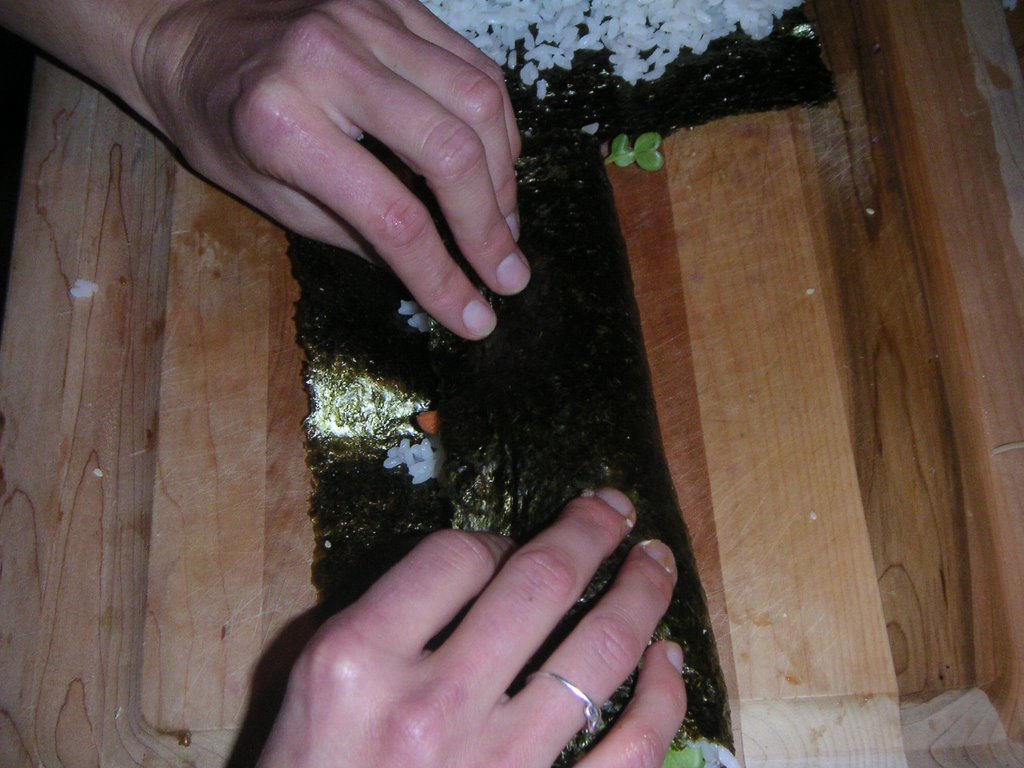
Squeeze it together along the length of the roll to make sure it's tight and won't fall apart on you - you can even fold the mat over and use it to squeeze things, or just use your hands.

Dip your fingers back in the bowl of warm water and run your finger along the inch-long space that didn't have any rice - this will allow the seaweed to stick to itself. Then connect the damp side to the rest, and seal your roll, smoothing things out as you go.
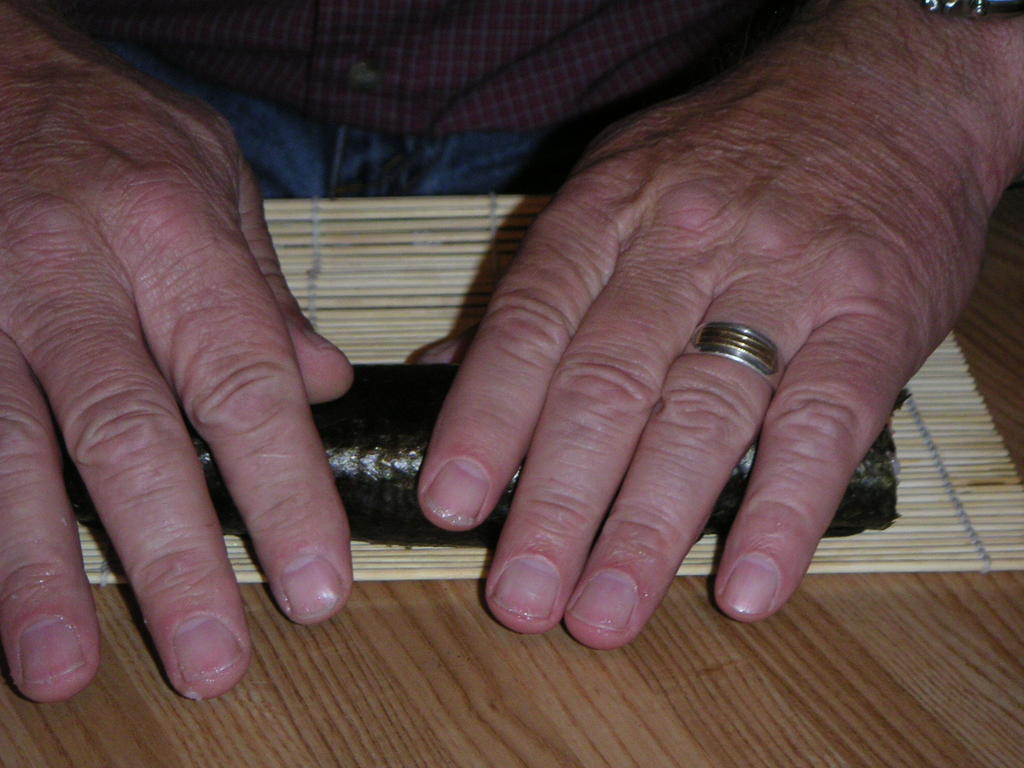
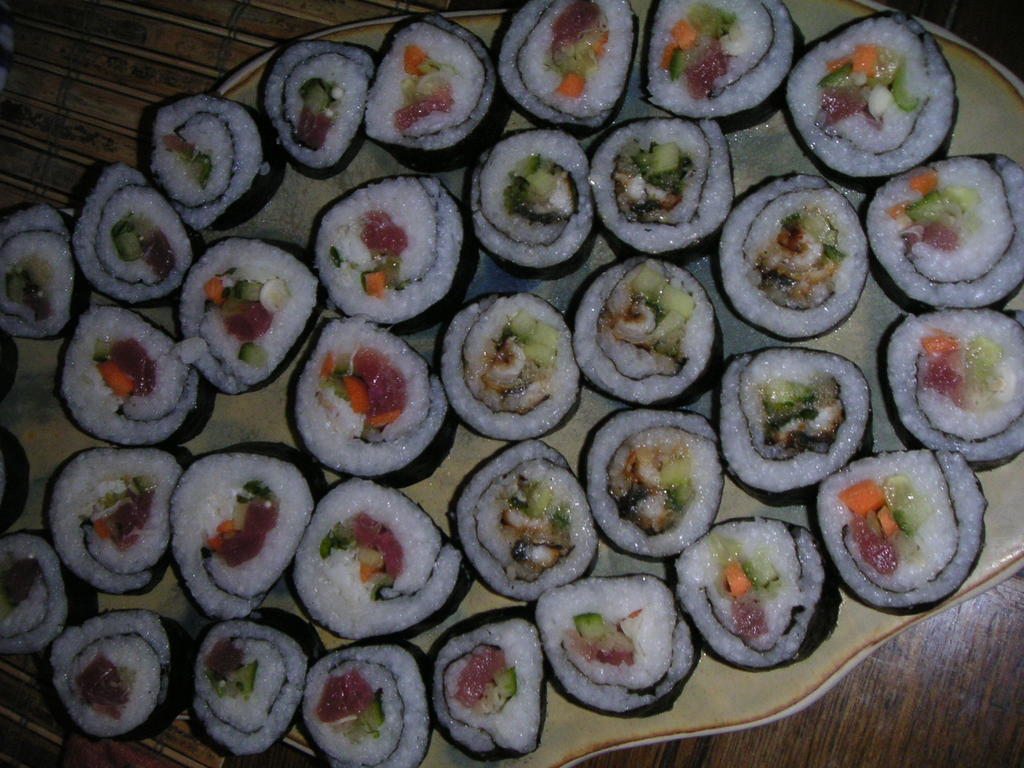
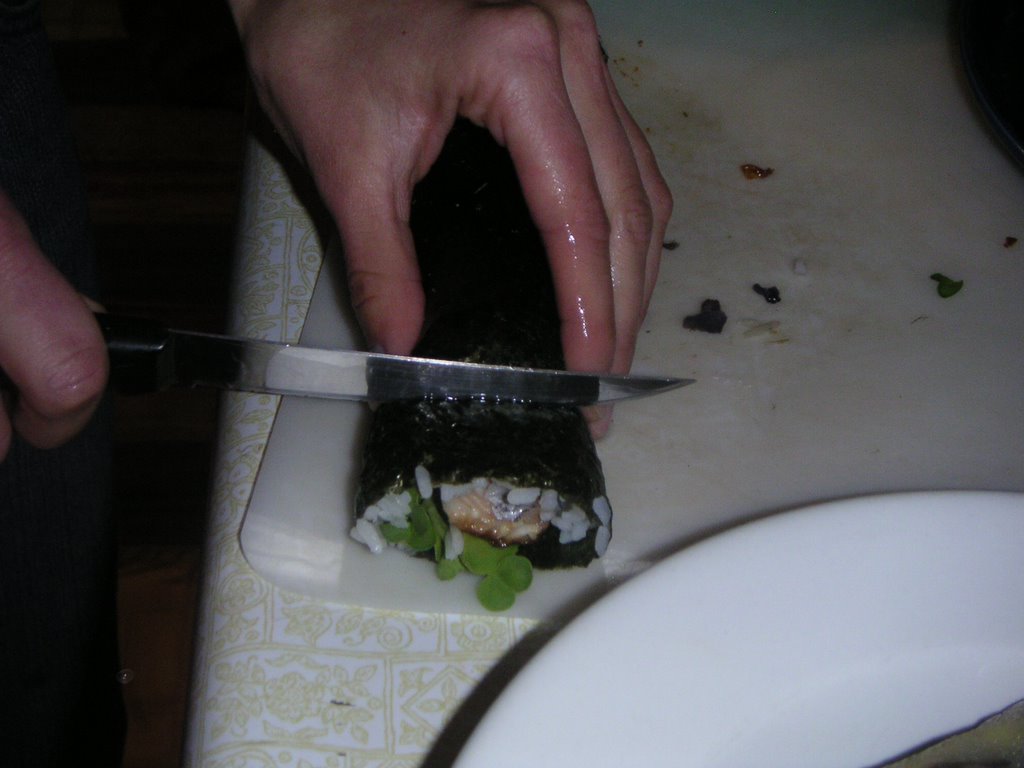
You can then cut your rolls into gorgeous little circles of sushi to eat. If you use a really sharp knife (I use a filet knife), they'll cut smoothly, but if you don't have one, dampen the blade of the knife you are using with a bit with water to prevent it from sticking to the rice.
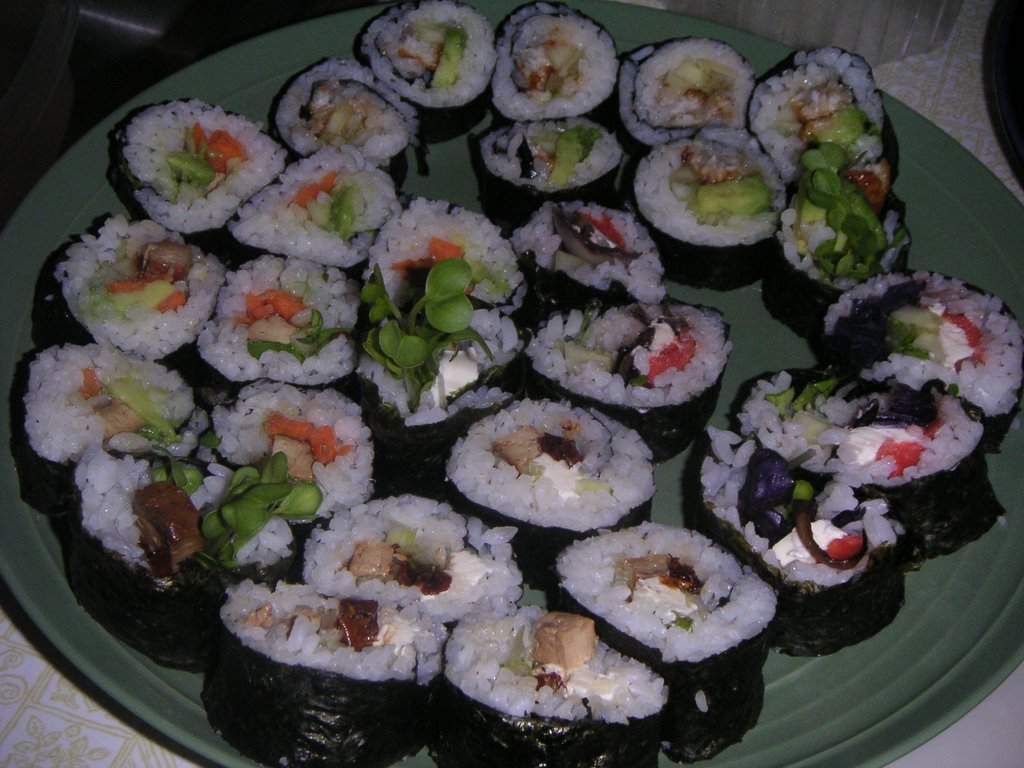
Arrange your presentation and *Tah-Dah!* You did it! You made your own sushi!
Now enjoy with many cups of sake (of course)!
Now enjoy with many cups of sake (of course)!


