

 Despite the fact that the rest of the USA thinks of Hawaii as an always-warm paradise (and it is, most of the time), it's been surprisingly cold here these last few days...I actually donned a long-sleeve shirt this morning and my little flip-flop laden feet are freezing under my desk as I sit here and write this...not comparable, I know, to those of you who are already foot-deep in snow flurries, but it's the coldest I've been since we moved here. Believe it or not, I'm not actually complaining, so what could possibly be my point? My point is: it's finally cold enough where I can make soups and stews and slow-roasted meats and vegetables and all the other Fall-themed food that the rest of you in colder climes have been smugly enjoying for the last couple of months!
You see, the last time I tried to make a soup (in September), LB and I began sweating profusely and could barely finish our meal we were so hot (it felt sort of how I imagine the hot flashes of menopause might be, and since I am not quite ready to head into that arena, no thank you!). That's not to mention the fact that every time I turn on the oven or stove for longer than 10 minutes, the entire kitchen (and house) heats up and we have to turn all the fans on. When I entertain, I have to have all the cooking finished long before any guests arrive so that the house can begin to cool down, lest we all sweat onto the pupus. And my favorite teas have all been turned into iced tea or sit, sad and unused in the cupboard because I find I have no desire whatsoever for a hot beverage before bedtime when it's still 80 degrees in my house.
But the ultimate test for the freedom to once again warm the house up while cooking? Roasting. Roasting involves turning the stove on at a high temperature for at least 45 minutes...an unthinkable act if it's already warm inside your house (if you should desire that your significant other not be cursing you from the cooler shadows of the room furthest from the kitchen). One of my favorite simple roasting recipes comes from Ellie Krieger, and it's a one-pan, chicken and vegetable dish that pleases everyone: it's easy to throw together (good for me), it doesn't make many dishes (good for LB), and you can improvise until your heart's content (good for you) with whatever vegetables you have available. It uses a few "summery" ingredients, like zucchini, which are available here year-round, but you could use more winter-esque vegetables too (winter squash, onions, and sweet potatoes? green beans are another nice addition too, just cut in half) and I'm sure it would still be wonderful. I tend to be a bit more lackadasical than Ellie in my preparation - like leaving the seeds in the tomatoes because it helps makes a deliciously juicy sauce by the time everything is roasted (and oh so perfect for sopping up with crusty bread), but you're welcome to follow the original instructions instead, if you'd like...the link to it is below.
This meal was completely local too, right down to the bird. But you know what? The vegetables themselves are good by themselves too. The chicken came from Blue Lotus Farms, and honestly, I think it was the first truly free-range chicken I've ever had. What I mean by that is: this bird used it's legs. A lot. That sucker had ligaments in its legs the size of my pinky finger! Gross if you're not that into meat (sorry!!), but a fact of eating it too. The dark meat was rich and chewy - evidence that those muscles had run around plenty before this chicken was captured for dinner - but also full of flavor (and slightly gamey, to be honest). Kind of makes you think about what a chicken is supposed to be like, before humans bred them to have such large breasts that they can't even move, or worse (if you haven't yet, read Michael Pollen's The Ominivore's Dilemma). It's breast was tiny - not like those gargantuan Dolly Parton chicken breasts you can buy at Costco by the bag, but it was moist and pleasantly chicken-y, and put together with several deliciously local vegetables, it made plenty for 2. Add a loaf of crusty Ba-Le bakery bread on the side to sop up the juices, and you've got warm, cozy comfort in a bowl...a cup of hot tea with local honey would even make a perfect dessert - preferably sipped while cozying up on the couch with a light blanket.
Tuscan-Style Roasted Chicken with Vegetables, serves 4
adapted from Ellie Krieger; find the original recipe here.
3 medium zucchini or crook-neck squash, cut into spears
8 Roma tomatoes, cut into 4 wedges
1 large bulb of fennel, cut into ~6 wedges through the root end
1 large onion, cut into ~6 wedges through the root end
4 bone-in chicken breasts with or without skin (or you could do a whole cut up chicken)
olive oil, salt and pepper
4 cloves of garlic, minced
1 tsp. dried oregano
1 lemon - zested, juiced and the rest of the rind saved
1 tbsp. fresh rosemary, chopped
optional: finishing salt (I used black lava) or chopped parsley
Preheat the oven to 375 F. Put the vegetables in a large baking dish and add a couple of glugs of olive oil and toss, adding a pinch or two of salt and pepper. Put the chicken breasts (or pieces) on top of the veggies and nestle them down in. In a small bowl, combine another glug of olive oil, a little more salt and pepper, the garlic, oregano and juice and zest from the lemon. Cut the lemon rind into four large wedges and add them to the vegetables too - why not? Rub the oil/lemon/garlic mixture on the chicken, and then pour the rest of the sauce over the top of the veggies. Roast for 30 minutes, then add the chopped rosemary and stir. Cook 20-25 minutes more until the chicken is cooked through and the vegetables are tender and starting to brown around the edges. Keep in mind that if you leave the skin on, it won't get really crispy because the veggies release so much water. I roast it with the skin on, then remove it before serving. Remove the lemon wedges before serving too - unless you like them! Sprinkle a little finishing salt or chopped parsley over the top and serve.
19.11.08
A Cold Day in Hawaii
15.9.08
Going Bananas in Hawaii
 Forget everything you know about bananas...those long, mushy or hard as a rock green phallic-looking things you get at the grocery store that are typically imported from Central or South America and taste, at best, slightly banana-like or way too sweet and banana-like - going from perfect to completely mushy in 60 seconds. You know the ones I'm talking about...they're as long as your forearm and taste about like it would probably taste to lick your forearm too...if you covered it in banana mush. It's not the other Americas' fault the banana varieties they typically export - the Cavendish and Williams are sub-par...but it doesn't make them taste any better by wishing they were either (sorry Other Americas).
Lucky me, I've never been one to like bananas much anyway (can you tell?). Sure, I loves me a good loaf of banana bread (especially one that is dense and caramelized on top, or with some dark chocolate chips in it - xoxo Kristin!), but eating one raw? Bah. Only if I have to so that it won't go to waste and if it hasn't gone too black and brown and mushy and overly banana flavored on me. And don't even get me started on banana "chips" - more like poker chips if you ask me, since that's about all they're good for (pass me a big one, LB - I win!). As a side note, dried bananas of any type are a dream...and we're talking whole, dried bananas people! Banana-y (but not too much), soft, chewy...they're positively onolicious (Hawaiian slang for super-dooper delicious)! But those can be sometimes be hard to come by, and expensive (if you're in the neighborhood, Kimberly often has dried apple bananas at her booth at the Farmer's markets or the next time you're in Haleiwa, you can find them at Celestial Natural Foods; if not, then try your local natural foods stores for dried bananas. Trader Joes also has them, but they flatten theirs and cut them into thin slices and it's just not quite the same.). I digress.
Hawaii's bananas, called apple bananas because of their slight apple-like scent, only slightly resemble their longer, mushier cousins. They are sweet (but not as sickeningly sweet as the other varieties), they are short and fat, they have a slight tang to them, and they stay firm (just the right amount of firmness) for far longer than other bananas. And they won't even go all brown on you as soon as you cut them and expose them to air! But it's the tang and the firmness that get my heart racing. I have loved these little babies since the first bite after we arrived here. Better still, we just happen to have several apple banana trees in our back yard! (oh Hawaii, how I love thee...oh landlord, how I love thee for planting thy trees...). But if you don't have an apple banana tree of your very own, or friends that have their own trees because they'll have them coming out of their ears every time they harvest, most of the supermarkets here have them too. I have also been told that some specialty stores on the mainland will carry them imported from Hawaii. (One note: do not harvest bananas from your tree in clothing you like - there is a super sticky resin that will look like rust on your clothes and never, ever come out). Also, while apple bananas can be found elsewhere, the soil in Hawaii makes them the most luscious, sweetest apple bananas out there...or so They say...and I believe it.
Funny, but here you will often find people buying their apple bananas green, not yellow, and letting them ripen at home. That's just how it's done. With most of the fruit here, actually. Buying fruit at different stages of ripeness allows you to get a variety of fruit on the same day (like the once-a-week farmer's market) and eat it all week long, at the perfect ripeness. Perhaps it's also because most of the tropical fruits sweeten as they ripen, so it's easy and accepted to buy them green and wait for that peak of ripeness from the comfort of your own home.
While I could eat several apple bananas a day raw (and I do), when we harvest from the tree, a large clump of bananas comes down at once...and they all ripen at once (bananas give off ethylene gas which will ripen any fruit around, even if it's not a banana, so keep your other fruits away if you don't want them to ripen too). So you can give them away, eat them yourself, freeze them or start baking and cooking with them right away. And I've been doing lots of all of these options, leaving me with several yummy banana recipes I'd like to share with you. So, expect more to come in the future. To tease you: apple banana gingerbread; caramelized apple bananas with brandy; and frozen apple bananas dipped in chocolate...
Those recipes are all delicious, but the first recipe I want to share with you really stemmed from not wanting to waste any food. Looking for something interesting to make for breakfast, I convinced LB to make a batch of Heidi's Baked Doughnuts (LB is the bread/yeast man in our house). They turned out pretty great and we ate them for breakfast twice - but LB had made a full batch of these babies, so we had several left over. I tore them up into 1/2"-1" pieces, and threw them in a freezer bag...I figured they'd make a good base for a sweet and scrumptious bread pudding. Well, I was right - they did. It was LB's general idea, and my recipe, and it turned out fabulous: (Apple) Banana Bread Pudding with Grand Marnier Sauce. It's a mixture of basic bread pudding recipes, reduced to four servings and made with what we had available, and we'll definitely be making it again (we still have doughnut pieces in the freezer!). An ever so slightly crisp topping set on a smooth and creamy base, it has just the right amount of a gentle tartness from the bananas to offset the sweet and rich butter sauce that feels like silk on your tongue, and the whole dish just screams comfort...it's like something your grandmother would make (you do know that Granny was always adding a touch of alcohol to your sweets, right? Helps with toothaches and such...). But better still, it's the perfect compliment to a dark, rich mug of Kona coffee.
Next time, I'd like to make a caramel sauce instead of using the Grand Marnier, although I do feel the very slight orange flavor complimented the gently tangy banana flavor quite well. I'm sure you could use brioche or even store bought sugar and cinnamon rolled doughnuts (or just add a bit more sugar and cinnamon to the recipe if you use something else) and you could probably use the more common varieties of banana in this recipe also (although you'll be missing that tiny bit of tang - maybe reduce the sugar a bit?) - but, my friends, you are certainly welcome to simply come on over and join us for breakfast, any time. We'll definitely be serving this to our house guests in the future.
Apple Banana Bread Pudding with Grand Marnier Sauce
serves 4
1 cup of soymilk (or regular milk - we can only afford soymilk here!)
1 cup of half and half
3 eggs
1 1/2 tsp. high quality vanilla extract
3/4 cup granulated sugar, divided
1/4 cup light brown sugar
1 1/2 tsp. cinnamon
1/2 tsp. salt
5 cups doughnut pieces, torn into 1/2 inch pieces (preferably Heidi's)
5 apple bananas, thinly sliced
1/4 cup unsalted butter, cut into pieces
1/4 cup powdered sugar
1 tbsp. Grand Marnier, or another orange-flavored liquor
Preheat the oven to 350F. In a medium bowl, whisk together the soymilk and the next 7 ingredients (through salt), adding only 1/2 cup of the granulated sugar (reserve 1/4 cup). Place the doughnut pieces in a large bowl and pour the mixture over the top. Mix gently and allow it to sit for about 5-7 minutes (since the bread component is doughnuts, it doesn't need very long to soak, you just want to make sure that all of the pieces are moistened thoroughly). If it doesn't seem moist enough, add an extra splash of milk or soymilk until it looks very moist, but isn't completely soggy. Gently mix in the apple banana slices.
Butter a 6"x 4" casserole dish (or you could probably use a pie dish, just adjust the ingredients accordingly (ie. up everything by 1/4 or so), and pour the mixture into the buttered dish. Sprinkle the top evenly with remaining 1/4 cup of granulated sugar. Cover the dish with a piece of buttered foil, and put it into a larger casserole dish on the middle rack in the oven. Pour hot water into the larger dish until it reaches about 1/2 up the smaller dish. Cook for for 25-30 minutes. Remove the foil and cook for another 10-15 minutes until the sugar becomes crispy and slightly browned, forming a little crispy shell on the top.
Just before it's about to come out of the oven, prepare the sauce. Melt the butter over medium heat with the powdered sugar, stirring until the butter is fully melted (but not brown!) and the sugar has dissolved. Remove the pan from the heat and stir in the Grand Marnier. Serve over the top of the bread pudding - with extra on the side (it's good)! The whole thing - bread pudding and sauce alike, is just as delicious the following morning if you end up with leftovers (but you might not).
Resources:
- Hawaiian words: ono - delicious; onolicious - super, duper delicious
- Dried bananas: apple bananas from Kimberly; regular dried bananas from Celestial Natural Foods, 66-443 Kamehameha Hwy, Haleiwa, HI 96712, 808.637.6729; or check your local natural foods store (Whole Foods in Hawaii does NOT have them)
24.7.08
Honey, You Had Me at "Let's Make Crepes"
 Barely into the beginning of our relationship – long before I had even discovered just how much I enjoyed cooking – LB and I went with about 20 other graduate students to Sun River, Oregon to partake in a yearly event: Free Ski Friday. On Free Ski Friday, Mt. Bachelor Ski Resort opens its doors and lets anyone ski on their magnificent slopes for an entire day – for the “cost” of brining 2 cans of food to the ticket counter. It’s a fund-raiser for Neighbor Impact, a coalition that raises money and food to feed the needy and less fortunate of Central Oregon. Being that graduate students often have a surplus of canned foods, and are always on the lookout for a bargain, everyone pitches in to get a rental house for the weekend, loads in cars and drives the four hours from Eugene to spend a rowdy three days drinking, eating, skiing, laughing and lauding until we’re all utterly and happily exhausted.
Usually, the cooking gets divided amongst the revelers and people pair up in groups to buy and feed the masses. Newly dating, LB and I ended up with breakfast the last day. In trying to decide what we wanted to make, we came across a worn copy of The Joy of Cooking in one of the cupboards of the rental house. For whatever reason, we settled on making crepes – something neither of us had made before. We drove to the one grocery store in Sun River, loaded up on fruit and Nutella, milk, butter and flour and set off to impress the rest of our cohorts.
Somehow, it worked. We did it without a crepe pan, with zero kitchen skills between the both of us, and with only the rental house's available kitchen tools. And they were fabulous. Ever since then, LB has been the crepe man of the house and we often make crepes for friends and house guests – filling them with homemade jams, seasonal fruit, chocolate wine sauces, and Nutella. A savory crepe or two has even occasionally graced the table (eggs studded with homemade sausage or thinly sliced steak with ginger shitake cream sauce), although the sweet fillings reign supreme in this house. The ingredients are almost always in the cupboard and the refrigerator, and the only garnish needed is a sprinkling of powdered sugar. In Hawaii, there is no shortage of sweet, tropical fruits to fill crepes with and they don’t even need chocolate sauce to satisfy. There is also no shortage of beautiful weather with which to enjoy a long, leisurely Sunday breakfast of crepes on the lanai with either. The raspberries are not local, and were certainly a luxury at $4 a 1/4 pint (on big, huge sale - they are normally $6.99 or more), but they were a colorful, flavorful addition that helped round out the sweetness of the other fruit - as did the magical, organic starfruit from our CSA, whose gentle astringency was also a welcome addition - plus, how cool is it to have a fruit shaped like a star?! It's just purrty! Just don't stick it in the fridge or it will get mushy and turn brown around the edges - oops.
While we now use our own worn and dog-eared copy of The Joy of Cooking (one of the first gifts I got LB), we make our crepes with whole wheat pastry flour (and sometimes vegan butter) and LB has tailored the recipe to make crepes that are delightfully thin and just lightly crisp around the edges, every time we enjoy them the taste still brings me back to that first shared kitchen experience. Who could have known that nearly six years later we’d still be making crepes together? But then again, maybe I did... Crepes a la L.B., makes approximately 7-8 crepes
adapted from a recipe by The Joy of Cooking
- 1/2 cup whole-wheat pastry flour
- 1/2 cup soy milk
- 1/4 cup lukewarm water
- 2 large eggs
- 2 tbsp. unsalted butter, melted, plus extra for coating the pan
- 1 1/2 tbsp. sugar
- pinch of salt
- 1/4 cup of cold water*
Preheat oven to 200F or just barely on (for keeping crepes warm). Coat a nonstick saute pan or a crepe pan (about 9" across) with butter. Then pour a nearly full 1/4 cup of batter into the pan, circling your wrist and moving the pan about so that the batter completely coats the bottom of the pan in a single, even, thin layer (*note: you can play around with the consistency of the batter here - if your first crepes come out too thick, add a splash or two more of water until they spread easy and come out thin and just ever so slightly crisp around the edges). Cook until the top is set and the underside becomes golden. Turn the crepe over - fingers work best - and cook until lightly browned and cooked through. Place the crepe on an oven-proof plate or dish and put in an oven at 200F to keep warm. Repeat for the remainder of the batter. Fill with yummy fillings of your choice and top with a sprinkle of powdered sugar.
Some of our other favorite crepe fillings:
Merlot chocolate sauce and raspberries
Homemade strawberry jam and whipped cream
Sliced bananas and a light smearing of Nutella
Apple or pumpkin butter, with a bit of maple syrup
Apples stewed with cinnamon, topped with whipped cream
Lemon curd (or vanilla yogurt) and blackberries
Cherries cooked down with a little sugar, almond extract and lemon zest, then sprinkled with toasted sliced almonds
8.7.08
The Best Thing Since Sliced Bread...Unsliced Bread!

For those of you still hanging on and coming around every once and a while to see what I’ve been up to, thank you. I’m glad you’re still here, and I appreciate you. Hugs and kisses all around! I know I haven’t been leaving many comments on your blogs lately (though I have checked in on many of you from time to time) and I haven’t done much on this blog the last month or two aside from frantically posting my Heart of the Matter entries (at the last possible moment), and I’m even more sad to report that I haven’t done much of anything the last month or two aside from working. Not even go to the beach – a sad feat when it is a mere mile (or less) from your doorstep. The crazy hours and non-stop sitting in front of my computer to prepare lectures and assignments for my students left me without the least bit of desire to sit in front of my computer a bit more and come up with something interesting to say.
That isn’t to say that I haven’t been in the kitchen though. One does have to eat, after all. Granted, the last week of classes - now thankfully a week past – LB was back to being my house-husband as we had our very first house guests (yay!) and I had three tests to write, about 50 assignments to grade and no time to do anything else. Taking a break from blogging for a month gave me the time to settle into my teaching, but also gave me the time to try new recipes of yours I’ve spied. While I love blogging, spending an entire month just reading and not worrying about coming up with a new recipe to try or modify every few days in order to have something I want to blog about was actually quite nice.
I’ve made Tanna’s Panzanella, Katie's Beetroot and Chevre Salad, Ann's Strawberry Shortcake with Buttermilk Biscuits and many of my own old standbys. All of them were delicious – tailored to include what was on hand or available here for a reasonable price. But while checking in on my namesake (well, almost my namesake) Michele at Oswego Tea, I came across this Soda Bread – a recipe from Alice Water’s latest cookbook, The Art of Simple Food - and the cutest heading by Michele: "I baked it myself." Now, as Tanna will tell you, I’ve been enviously reading about her exploits in bread baking, as well as the rest of the BBBs (Bread Baking Babes) for quite some time now, yearning to try baking bread from scratch. There have been so many beautiful breads I’ve wanted to make, recipes I’ve bookmarked and gorgeous photos I’ve drooled over, each one calling out to me that THAT would be my first bread...but it was Alice’s recipe and Michele’s coaxing that got me in the kitchen one day when we were out of bread.
I think I’ve mentioned that bread is a bit expensive here (like everything else) and while I’ve gotten used to paying $4 for a loaf of bread (hey, I paid $3.94 in Eugene anyway), it would sure be nice not to have to buy bread and be able to put that $4 a week into say, a bar of nice dark chocolate to snack on or some mango curd, or something. And while this isn’t a yeast bread, and thus requires no rising, I think it’s the beginning of a beautiful friendship and I hope to be baking bread more often (next up: yeast, baby!).
This bread is dense and has a chewy, crunchy crust. It’s got a great crumb and a lovely rustic look and heft to it that makes you take a step back and say – holy crap! I made that! And it wasn’t even that hard! It’s missing that yeasty smell and goodness that only breads that require a rise can have, but it makes great buttered toast for dipping into soft boiled eggs, hunks of it make perfect sops for soups and sauces, and it’s absolutely perfect for LB and my favorite summer breakfast of tomatoes and cream cheese on toast. But of course it’s good, it’s Alice Water’s recipe.
Like Michele, there’s no way I’m posting the recipe for this, as Alice Water’s is one of my heroes and you don’t mess with a woman (er, goddess) like that. But you can follow the same link that Michele gave if you’d like to find it and try it yourself: Alice Water’s Soda Bread.
I followed the recipe exactly – except I used half whole wheat pastry flour (I didn’t have bread flour, but that might have yielded even better results) and half all-purpose flour. While this works well, I wouldn’t use all whole wheat flour because it’s already such a dense bread. Also, be sure to add a tsp. or tbsp. of corn meal on your buttered baking sheet (or use parchment paper - something oddly difficult to find here) to prevent it from sticking - because it will stick, like cement, if you don’t.
While the “thumping” and the hollow sound you’re supposed to get eludes me, I’ve found if I give it about 35 minutes instead of 30 at 400F, until the crust is a deep, darkened brown – but not too brown – and when you can thump the top crust instead of the bottom (which is difficult to do with really hot bread!) and it truly feels like a hardened “crust,” then the inside will be thoroughly cooked. Don’t forget to cut the cross into it either, we made that mistake too – and while it still seems to rise properly, it didn’t finish cooking in the middle of the bread, leaving it doughy and uncooked and well, just not as nice as it could be. Until next time then, my friends - I'll see you in the kitchen.
11.5.08
Tofu Home Run

Tofu is one of those things that people seem to either love or hate. LB and I happen to be on the love side of the tofu fence, and even if you only think it's an okay source of protein, you might just give this a try anyway and see what you think.
Back in "the day," before my tofu loving days (yikes, I just turned 30, so what day would that be?), I had eaten it strictly with Asian dishes, mostly at Chinese restaurants, and would never have dreamed of cooking it myself. In fact, I didn't cook much back then anyway. Thus, being a tofu-cooking virgin and all, when I first began my forays into the realms of this mysterious yet desirable food, I started out buying baked tofu. The texture was somewhat more appealing than the cold and mushy stuff that came packed in water (and I'll be the first to admit that even the extra-firm tofu is still a bit soft). I think I cut it up and put it in pasta salads with chunks of mozzarella, torn basil and fresh cherry tomatoes or some such thing. I really tested the limits here when I tried mixing up the flavors - from Italian- to Thai-flavored baked tofu. Ohhhh...I felt so daring! This bumbling attempt at first base, as it tends to be sometimes, was only mildly satisfying and soon I had visions of pushing the boundaries and going a bit further.
When I finally got up the nerve to try and reach second base, opening up one of those watery packages and letting my fingers caress one of those big juicy white blocks, I was well on my way to tofu love. I added big chunks of the fluffy stuff to stir fries - mixing it in with snow peas, carrots, water chesnuts, bean sprouts - all the good stir-fry stuff. Because that's what you use tofu for, right? "Asian" food and health food (and I didn't know how to make weird health food dishes, so those I bought pre-made), and that's about the extent of my affair with it.
I rounded third base when I learned to drain and then gently fry the tofu in a small amount of oil. This gave the little cubes and rectangles I had cut from the big block a nice, almost crispy texture that held up better in stir fries and in my favorite udon noodle soup. These experiments led to things like grilled tofu and tofu larb (another favorite). This was a whole new level of experience for me! I'd spend my time flipping through cookbooks, looking for new ways to satisfy my tofu cravings. By this time, there was no turning back. I had to go all the way.
And there's nothing quite like crossing home plate, baby. I discovered this tofu recipe in an old Martha Stewart cookbook I picked up from our local independent book store in Eugene (Smith Family Books), and it's been a favorite ever since. We've modified it on occasion, adding different garnishes, etc. but it's so simple that you really don't even need a recipe (though the sauce is good). And it's not only a favorite recipe, but the best way to eat tofu that I've found. It's tofu, in it's purest, naked form - it's birthday suit, really - raw. When I first saw the recipe: Cold Tofu Salad with Soy Ginger Dipping Sauce, I wasn't too sure about raw tofu, but I thought, what the heck? I was in love with tofu already...might as well try it once. Even if it's not everything I hoped for, it would probably still be good anyway, right? And it might even elevate my relationship with tofu to a whole different level. So I did it. I tried it. And it was good. Really good. Raw and primal and delicious. So good, in fact, that I even told my friends about it. So good that I'm posting it here and trying to convince you that you should try it too...like I said, it's a home run, baby. Next inning, please...
Cold Tofu Salad with Soy-Ginger Dipping Sauce, serves 4
recipe originally from Martha Steward Healthy Quick Cook
1 block extra firm tofu (preferably organic)
4 scallions, white and light green parts thinly sliced lengthwise into strips
2 tsps black sesame seeds
garnishes - bean sprouts, a cherry tomato, anything you'd like really
2 cups crushed ice, for serving
Dipping Sauce
1/2 cup low sodium soy sauce
3 tbsp. seasoned rice vinegar
1/2 inch of ginger, peeled and finely grated
1 scallion, thinly sliced crosswise
Slice a block of extra firm tofu into thin slices - thick enough that you can pick them up with chopsticks, but thin enough that you can enjoy the flavor without thinking to yourself, "crap, I've got a big bunch of raw tofu in my mouth!" Put crushed ice in bowls so that there is a mound on the bottom of each bowl, and lay the slices on top of the ice so that there are equal numbers in each bowl (trust me, I'm not usually one to worry about how something is served, but the ice actually makes this better). Garnish the top with the black sesame seeds (or toasted white ones would work too, but the black is a great contrast), and any other garnishes you want to add. Aliquot out the dipping sauce so that there is a small bowl for each person. Dip, eat and fall in love.
29.4.08
Stepping into the Ring

The first time you use an unfamiliar kitchen, and especially an unfamiliar oven, it can be quite a challenge. You don't know how that oven or stove is going to act...will it pull tricks on you? Burn everything you put in it? Have even heating? Become your nemesis? Pulling out my pots and pans for the first time in my new Hawaiian kitchen felt like stepping into a boxing ring, and I was not sure if I was ready to face my opponent...the new oven. To make matters worse, the first time I used it, I took on a real challenge: baking a tart for my 30th birthday. If it didn't come out, if I burned the crap out of it (or alternatively, if it ended up coming out looking like a sad, sorry, unevenly baked doughy little thing), I was sure going to be disappointed...
Now for a little background...Smoothtop, our resident champion, is known for a move Hawaii-5-O hasn't come up against in a quite a long time. It's called, "the broiler." In her last fight against the GE 5000, this little move was almost the end of Hawaii-5-O's love of baking! With nearly 100 degrees of extra heat under normal fight conditions, when the GE 5000 used "the broiler," it would short out the entire house, set off the fire alarms, burn the hell out of whatever was in the oven and end the fight. It took a fair amount of time before Hawaii-5-O figured out how to stop the GE 5000 from pulling that one on her, allowing her to finally take the lead and secure her Oregon title. Now that she's moved to the Islands though, she's got to win this fight or hang her head, give up the oven, and go back to the grill and the saute' pan if she lets Smoothtop best her.

And just what's at stake, you ask? Why nothing less than a year's worth of either burned or perfectly roasted meats and vegetables, and a whole lot of blackened or golden-brown baked goods, of course! The winner of this first round reigns supreme for the remainder of the time these two fighters are in the kitchen together, and there's no real second chance on this one. It's a fight to the "death" of a 30th birthday tart, and as you all know, you only get one 30th birthday. Beware folks - it may not be pretty. Parents should be advised that this fight could contain images of blackened crust, resulting in much cursing and language from one of our contenders (namely, Hawaii-5-O) that isn't appropriate for youngsters or maybe even the rest of the blogosphere.
But enough of this jabbering! Let's get this fight started! There's the bell -
tightening her apron as she goes...
She turns to the left,
quickly grabs the Cuisinart food processor and...
pulverizes a bunch of white nuts
(since this is Hawaii, they're probably macadamia nuts)!
This is obviously a move to unnerve Smoothtop
from his stoic stance on the far side of the kitchen.
But Smoothtop is still holding steady...
Hawaii-5-O turns and faces him, sneers...
She reaches up...
And she snaps Smoothtop's dial, turning it to a raging 350F!
That's pretty hot! These fighters aren't just playing around!
Smoothtop's face turns bright red with heat -
it looks like Hawaii-5-O has really pissed him off!
Hawaii-5-O returns to the far side of the kitchen,
even turning her back on Smoothtop (she's pretty brave to do that).
Will he turn on "the broiler" while she's not looking?
Now she's pressing those nuts into a tart pan,
and turning back to face Smoothtop -
he just let out a little whelp...
She quickly runs up to him, opens his door
and faces that red heat without even blinking.
Before old Smoothtop can even do a thing,
she's thrown the tart in, and closed the door!
Now she's back at the counter,
mixing, beating and folding -
all the while watching Smoothtop out of the corner of her eye.
In just 12 minutes, Hawaii 5'0"turns back around to face our champion,
approaches him slowly, and whips the tart out of the oven.
and...
Whew...golden edges.
It looks like the fight is over and we have our winner, folks:
Hawaii-5-O reigns supreme!
She's the champion of this Hawaiian kitchen and
it looks like we can be expecting to see a fair amount of
oven-cooked and oven-baked recipes coming from this blog then.

Having prevailed at my first attempt at baking in this new oven, I felt it was time to celebrate (not only the baking, but surviving my 3rd decade and coming out with only a few gray hairs and wrinkles too - hey! you take what you can get at this age, right?) and LB and I opened up a bottle of Moet and Chandon champagne, a Christmas present from my sister and brother-in-law, which we brought all the way from Colorado to Eugene to Hawaii for this very occasion (the birthday), and toasted to my successes. I can't think of any better way than to celebrate...except maybe heading for the most amazing sushi restaurant that I've ever been to, but that's for LB's 30th, in a little over a week (we decided to split up the indulgences - I got the champagne on mine, he gets the amazing dinner on his, and we both benefit from each), and I'll fill you in on that when the time comes.

This recipe is extremely versatile and delicious. It garnered rave reviews (as did the champagne) and stories about it have even been shared (always a good sign, no?). I got the original recipe from a friend, who had modified it, and I further modified it by changing the crust and the topping. Make it with whatever you have in your neck of the woods or whatever is seasonal right now. I used a locally made Mango and Peach curd with Rose Petals from Planted by the River (see source info below), and it's smooth, gently sweetened taste went perfect with the slight tang of the mascarpone and cream cheese mix. The rose petals added a whole extra dimension of complexity to the curd and it all worked together perfectly.
Were I still in Eugene (yep - still occasionally dreaming), I'd make the crust with hazelnuts and do some kind of a berry jam or curd on top it. How about a hazelnut crust with huckleberry jam? Maybe an almond crust and meyer lemon curd on top? Oh, or thin slices in early spring strawberries would be just amazing too. Even here in Hawaii, I could have used lilikoi (passionfruit) or guava curd or jam, which was my original intent but the store was out, or even overlapping slices of fresh mango slices or another fruit nestled together (whole raspberries?) would have been both delicious and beautiful. I would have loved to have garnished the top with a few mango slices this time too, but alas, no mangos in the house this week. Maybe next time!

Sources:
Planted by the River
Mililani, HI
http://www.plantedbytheriver.com/
You can order these delicious curds online, or there are several local sources listed on the website. Some time in the future, I may try and contact the entrepreneurs, Randy and Donna Nakamoto, directly to see if they would let me come see them make their beautiful exotic curds. And these curds are some of the best I have ever tasted. When doing the search for their website, I found that even Heidi, from 101 Cookbooks, agrees.
14.1.06
Home Sweet Home

I'm back from the land of citrus and warm winters, and I'm dying for some home-cooked food!
Unfortunately, I wasn't able to eat out at any wonderful restaurants while I was in Orlando - I ended up having dinners with collaborators at mostly chain restaurants or Disneyworld favorites and breakfast and lunch were spent trying to find something cheap and fast. Thanks to the suggestion from Faith in Orlando, who commented on my site before I left, I was able to try some southern Indian cuisine because I suggested it to a friend who tried it and brought back the extras (delicious!). I suppose I should have guessed this would be the case with no car, an extremely modest budget, and being at the mercy of my own desire to follow around and socialize with distinguished scientists in my field who didn't have the world of fine-dining in mind while at the conference. Not to say that many scientists don't like food as much as myself (they do!) but they either had different tastes - "anything but Indian food" (Damn!) or "let's just eat next door at Chilis because the line at this place is so long and I have to work on my talk" (noooooo!!!!). Ah, such is life.
I did, however, get my hands on some lovely, freshly picked, bright yellow home-grown grapefruits to bring back some sunshine to my very wet and very flooded Eugene, courtesy of a University of Florida faculty member up in Gainesville. I felt like my prayers had been answered! In the airport in Phoenix, I also picked up some heirloom popcorn and some prickly pear cactus jellies. So, all was not lost!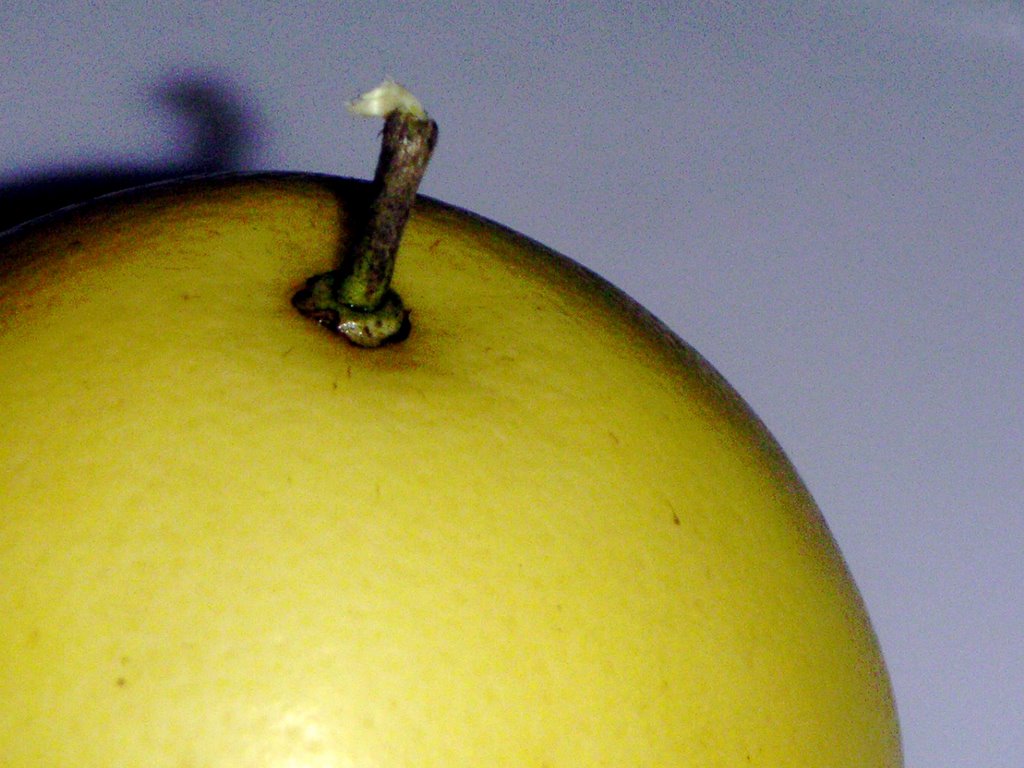
So, in an effort to re-gain my feeling of being home, I want to share with you one of Loving Boyfriend and my own favorite recipes: Lentil Enchiladas. This is one of those recipes I've been cooking for ages and have cooked over and over. It's perfect for a dinner at home for two (even the leftovers are great), or nice enough to make for guests. It's also a vegetarian dish that even a carnivore could love. And even better? It's also healthy, one of my goals for how I'd like to see my cooking evolve this year (Inspired by recent posts by Vickie at the Moveable Feast Food Blog and Ilva at Lucullian Delights). I'm not even sure where it came from, but it's been good enough to have stood the test of time...and in a kitchen like mine, where I cook something new nearly every night, that's saying a lot!
Lentil Enchiladas
Serves: 4
ENCHILADAS:
1/2 cup lentils (I use the brown variety usually)
1 cup chicken stock
1/4 cup red onion, finely chopped
2 tbsp. red wine vinegar
1/2 tsp. cumin
salt and pepper to taste
3/4 cup avocado
4 tortillas
1/2 cup sharp cheddar cheese
1-2 limes, quartered (for garnish)
SALSA:
1 1/2 cup chopped tomatoes
3/4 cup corn kernels
2 tbsp. chopped cilantro
1 garlic cloves, minced
1 tsp. lime juice
1/2 - 1 seeded and chopped jalapeno
salt and pepper to taste
Bring chicken stock to a boil in a medium saucepan. Add lentils, and return to a boil. Cover, reduce heat and simmer the lentils until all the liquid is absorbed (about 30 minutes). While this is cooking, mix together the ingredients for the salsa. When the lentils are finished, remove from heat and add red onion, red wine vinegar, cumin, and salt and pepper and mix together. Fold in the avocado.
Spray a baking dish with cooking spray or rub it with a bit of olive oil. Warm the tortillas in the oven (wrapped in foil) or microwave (NOT wrapped in foil, try paper towels), then fill each with 1/2 cup of the lentil mixture and roll them up, placing them in the baking dish seam side down. Sprinkle with tops with cheese and bake for 10 minutes, or until cheese melts and becomes bubbly. Serve topped with salsa and lime wedges.

 Posts
Posts


